I have to admit, I have never eaten gingerbread before (yes..gasp!). So I'm not sure if I got this cake spot on, but going by the speed and intensity with which it was polished off, I'd say I did a pretty good job.
Most people make a gingerbread loaf, but I opted to make a 'cake' instead. Whats the difference you ask? Well for starters I used more egg, so my cake was fudgy. If you want to go the loaf way just use one egg. I also frosted my cake. I read up on someones claim that this frosting is the only other frosting you will ever need. That'd you'd never make any other frosting again. Bold assertion. So I decided to hold her up to it. And it does make one mean icing. More details below:
Ingredients:

2 1/2 cups all purpose flour
1tsp ground cinnamon
2tsp ground ginger
1/2 tsp nutmeg
1 tsp cocoa powder
1 tsp baking soda
500gms unsalted butter at room temperature
1/2 cup granulated sugar
1/2 cup brown sugar
2 eggs
1/2 cup molasses or treacle
1/2 cup warm water
A pinch of salt
20ml coffee liqueur (optional)
I've got the basic recipe from here, but as you can see, I've modified the ingredients and proportions quite a bit. Instead of expresso powder I've used coffee liqueur and I've also added cocoa for a bit of colour and flavour. I've used just a small bit as I want it to act more as a spice, I don't want to end up making chocolate cake here. The cake gets its colour from molasses, by adding cocoa you are going to get a really really dark cake. So skip the cocoa if you don't want your cake to be too dark. And speaking of spices, since the frosting is really sweet, I doubled up the spice quantity for a nice hit.
Preheat the oven to 175 degree celsius. In a bowl, mix your dry ingredients.
In another bigger bowl, cream the butter and add in both sugars. Mix till smooth. Add in the eggs and molasses and mix till combined.
Add 1/3 of the dry ingredients and mix. And 1/2 the water and mix. Repeat till you end with the last batch of dry ingredients. Incase you are using a stand mixer, mix at low speed. You should be looking at a nice luscious batter

Line your cake tin with butter and pour in batter. Bake for 30mins or until toothpick inserted at the centre of the cake comes out clean.
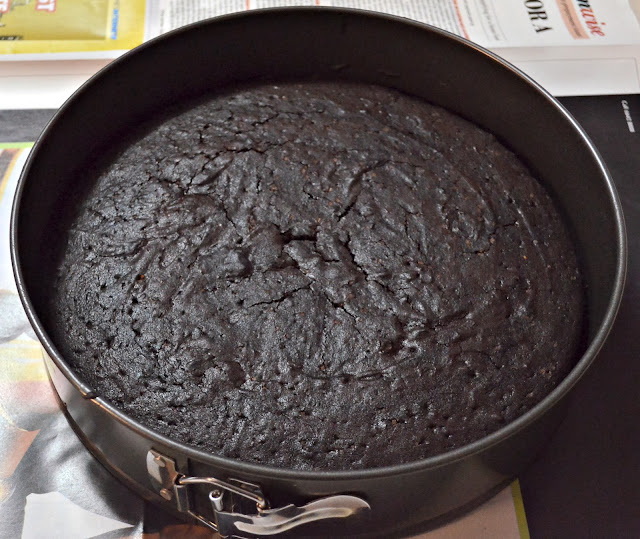
Look how beautiful that is! Leave it to cool, before icing. I also drizzled some Cointreau as soon as I pulled it out of the oven. Hot cakes absorb flavour better.


Tip: If you really want a nice spice hit to your cake, add a bit of ground pepper to the batter. Or add star anise for a liquorice taste.
Note: Traditional gingerbread has some element of lemon and/or orange in it in the form of zest and juice. If you are going for a loaf, I'd recommend you scrap the espresso and add the zest and juice of a lemon/orange.
Please don't mind my clumsy attempt at icing. I actually bought really fancy icing tools that gave up on me while icing this cake. Hence good ol' spatula to the rescue.
Most people make a gingerbread loaf, but I opted to make a 'cake' instead. Whats the difference you ask? Well for starters I used more egg, so my cake was fudgy. If you want to go the loaf way just use one egg. I also frosted my cake. I read up on someones claim that this frosting is the only other frosting you will ever need. That'd you'd never make any other frosting again. Bold assertion. So I decided to hold her up to it. And it does make one mean icing. More details below:
Ingredients:

2 1/2 cups all purpose flour
1tsp ground cinnamon
2tsp ground ginger
1/2 tsp nutmeg
1 tsp cocoa powder
1 tsp baking soda
500gms unsalted butter at room temperature
1/2 cup granulated sugar
1/2 cup brown sugar
2 eggs
1/2 cup molasses or treacle
1/2 cup warm water
A pinch of salt
20ml coffee liqueur (optional)
I've got the basic recipe from here, but as you can see, I've modified the ingredients and proportions quite a bit. Instead of expresso powder I've used coffee liqueur and I've also added cocoa for a bit of colour and flavour. I've used just a small bit as I want it to act more as a spice, I don't want to end up making chocolate cake here. The cake gets its colour from molasses, by adding cocoa you are going to get a really really dark cake. So skip the cocoa if you don't want your cake to be too dark. And speaking of spices, since the frosting is really sweet, I doubled up the spice quantity for a nice hit.
Preheat the oven to 175 degree celsius. In a bowl, mix your dry ingredients.
In another bigger bowl, cream the butter and add in both sugars. Mix till smooth. Add in the eggs and molasses and mix till combined.
Add 1/3 of the dry ingredients and mix. And 1/2 the water and mix. Repeat till you end with the last batch of dry ingredients. Incase you are using a stand mixer, mix at low speed. You should be looking at a nice luscious batter

Line your cake tin with butter and pour in batter. Bake for 30mins or until toothpick inserted at the centre of the cake comes out clean.

Look how beautiful that is! Leave it to cool, before icing. I also drizzled some Cointreau as soon as I pulled it out of the oven. Hot cakes absorb flavour better.


Tip: If you really want a nice spice hit to your cake, add a bit of ground pepper to the batter. Or add star anise for a liquorice taste.
Note: Traditional gingerbread has some element of lemon and/or orange in it in the form of zest and juice. If you are going for a loaf, I'd recommend you scrap the espresso and add the zest and juice of a lemon/orange.
Please don't mind my clumsy attempt at icing. I actually bought really fancy icing tools that gave up on me while icing this cake. Hence good ol' spatula to the rescue.


