Search This Blog

Showing posts with label Of Puddings & Pie. Show all posts

Amarula Phirni


Phirni is India's version of rice pudding. Made from ground rice and served in traditional earthen bowls called shikoras, it is a bowl of nostalgia for any Indian. I pondered hard on how to spin this lovely dessert without losing its integrity. And for that I turned to my favourite liqueur - Amarula.


Being in New Zealand, I couldn't really find traditional shikoras, but I thought these tart shells are the perfect vessels. It provides a nice crunchy texture and cuts the richness of the dessert. And I am a big fan of edible bowls.


Recipe:

  1. Rinse 1/4 cup basmatic rice and drain. Grind the rice till the consistency resembles coarse semolina
  2. In a saucepan, bring 1ltr of milk to boil
  3. Once the milk boils, add ground rice and 1 cup of sugar and stir
  4. Stir till the milk reduces to about 50% and turn off the heat
  5. Once the mixture is cooled to room temperature, add a generous amount of Amarula and stir
  6. Refrigerate for 2-3 hrs to let it set
  7. Serve on store bought tart shells with a sprinkle of cinnamon or cocoa  


Amarula can obviously substitued for any cream based liqueur you have, like Irish Cream or Sheridan.


You can also flavour the milk with cardamom. In case you cannot find tart shells I'd recommend serving these on Biscotti


Aamras Tarts


Look at these beauties! Just the sight of them make me smile. I think these pictures will brighten up anybody's gloomy day. And to think I clicked it during Mumbai's dull rains. I am extremely proud of my photography skills in this post. So proud that I've forgotten to talk about the actual recipe...oops!


So I had the last of the mangoes lying in my fridge. My father went on a mango hoarding spree once the monsoon set in. He actually bought 10kgs of mangoes! By the time I was down to my last on I couldn't stand to eat another bite. So I thought, how could I innovate with this poor fella. I didn't want to make the same old boring cheesecake. Then it struck me...why not aamras with a twist? I basically had ready made tart shells that I bought from a local farsan shop, so I whipped these up for a quick tea time treat

If you're not from India, aamras is basically mango pulp that's whipped to a silky, deliciously thick puree and sometimes sweetened with sugar. It is just divine!


Makes approx 10 tartlets
1 large mango
1tbsp honey (replacing sugar with honey to make this healthy!)
10 tart shells*

*You can buy these at any local bakery or the bakery section in the supermarket. I got mine from Trupti Farsan.


Cut the mango in half and scoop out all the pulp. Make sure you don't lose any of the oozing juices. In a blender, add the pulp and a spoon of honey. Blend for 30secs till the pulp is nice and creamy. Spoon it over tart shells or nacho chips or toasted bread or what have you. Sprinkle some chilli flakes (mango and chilli are like Adam and Eve) to give a nice kick (optional) and enjoy!


Vegan Pudding


Serves 4

1 cup non-dairy whipping cream*
2 tbsp Maple Syrup (use honey or sugar as substitute though it won't be vegan)
2 over ripe Bananas (preferably plantains)
100 gms Dark chocolate
200gms Oreos (optional)


*Almost all whipping cream available in the market is dairy free and soy based. And trust me it is lighter, lasts longer and tastes better than the dairy version. Popular brands include Rich's, Topolite, MerryWhip & GoldTop. They come in 1kg packs, and since it's not an everyday ingredient, I just divide the contents into individually portioned containers and freeze it. Ensure you write the serving size (1 cup, 1/2 etc) and the date on top of the container. When you need it, just thaw out one container in the refrigerator for a few hours.

In a small bowl, mash bananas so that no big chunks remain. You can use the blender to get a smooth puree if you prefer. In a blender or using a rolling pin, crush oreos till it crumbs and set aside (you can skip the oreo crust if you're not up for it...but seriously...should you?)

In a large bowl, pour in the whipping cream. Using a whisk or hand mixer, whip the cream till soft peaks form. Now drizzle the maple syrup and add the bananas. Fold in the bananas and maple syrup so as to not deflate the cream.

You can use individual glasses to portion or a large serving dish. To assemble, spread the oreo crumbs at the bottom, topped with the cream mixture. Alternately, you can build a trifle with layers of oreos, cream and mashed bananas. Refrigerate for 30min to an hour to cool the pudding. Grate dark chocolate on top and serve!


De-constructed Pavlova


I died, went to heaven and came back to ground reality all in one bite. There was just so much going on in one bite...so many textures, so many flavours and sensations.  Picture a crispy meringue shell with a marshmallow soft centre, luscious cream and a mountain of fresh fruit. It's such a graceful dessert, and yet so intoxicating. I'm addicted.


It's also a great hit at dinner parties for its novelty and easy to make recipe. You can easily portion them into glasses or small bowls for individual servings and you can make the meringues ahead of time.


Pavlovas are relatively easy to make and the ingredients are pantry staples. I have a confession to make however, I've tried to make meringues multiple times, but failed miserably. I tried whisking egg whites with my hands and progressed to using hand mixers, but nothing works except a stand mixer. If you don't own a stand mixer like KitchenAid, don't even try attempting this dish. But if you do own one, you can whip up this dessert in under 10mins (minus baking time).

Makes one large (approx 12") Pavlova

4 egg whites
250g castor sugar
1tsp vinegar
1tsp cornflour
1tsp vanilla extract

For the topping
5000gms stawberries, halved
3tbsp icing sugar
1tbsp balsamic vinegar (optional)
250ml cream
1tsp icing sugar

Pre-heat oven to 150C. In a stand mixer, whisk egg whites until they form stiff peaks. Now whisk in the sugar one tablespoon at a time, until the meringue looks glossy.


Whisk in the rest of the ingredients. To bake the pavlova use a silpat or line a baking tray with parchment paper. Spread the meingue in a circular fashion. Spread it such that the sides are a little higher than the middle.


Bake for 1hr and let the pavlova cool completely inside the oven.

For the topping:

Whisk cream with a pinch of icing sugar, till it swells up a bit. I don't recommend adding too much sugar to the cream as the meringue and strawberry mixture already contain quite a bit of sugar. The cream cuts the sweetness beautifully.

In a saucepan pan, add the halved strawberries with sugar. Heat on a low flame till the sugar dissolves, then bring to a simmer. Cover pan and cook for 2-3mins. Cool, and add balsamic vinegar if you like. What we've made here is a basic compote which can be stored for two weeks and can be used to top anything from pancakes and waffles, to scones, to even bread.

Once the meringue is cool, spread the cream over the meringue followed by the strawberries. Drizzle the strawberry syrup over the meringue and serve.


To serve as my de-constructed version, cut out part of the meringue and crush with your fingers to form rough sized crumbs. Drizzle cream on top of the crumbs and place individual pieces of strawberry on top. Bring it all together by drizzling some strawberry syrup.


I honestly find this de-constructed way the best way to serve. Its easier to portion out, plus less messy to cut.


P.S: I'm going to let you in on a discovery I made. I stored the leftover Pavlova over night and tried it the next day, and it tasted even better. Try eating your Pavlova cold rather than room temperature. The meringue has a beautiful silky, custard like taste and texture. It is beyond tasty.


Strawberry Parfait


It's that time of the year again! Fruits are aplenty and strawberries are leading the pack. Now I had a lot of leftovers from all that Christmas baking - a little cream here, a little jelly there - and the most obvious thing to make would be a trifle. But this post is titled parfait and not trifle so this begs the question, what is the difference between a parfait and a trifle? They are both layered desserts which pretty much look the same. Well after a lot of digging around I think it fundamentally boils down to two key ingredients that make a trifle which do not usually feature in a parfait - one is cake and the other is custard. Cake and custard is essential for a trifle while a parfait usually is made of ice cream or whipped cream. Not earth shattering distinctions if you ask me but tasty all the same.


My parfait today comprises of everything I had leftover from Christmas, namely whipping cream, mascarpone cheese and cranberry jelly. So I just got some strawberries (because everything is better with strawberries!) and whipped up this dessert.


It makes more sense to serve this dessert in fancy glasses as individual portions, but you can also layer it in a trifle bowl if you like.

Makes enough for 12

250gms digestive or glucose biscuits
2tbsp melted butter
250gms of cranberry jelly *
250gms Mascarpone cheese
250gms whipping cream
50gms castor sugar
500gms strawberries

*adding jelly is optional, I had some homemade cranberry jelly in the fridge and hence I used it up.


Whip the whipping cream till triple in size. Add the mascarpone cheese and sugar and whip again. If the mixture looks too thick, add a little milk. You can also add a little booze or liquor to cream if you like.

Crush the biscuits to a coarse crumb texture. Drizzle in the melted butter and mix thoroughly. Slice strawberries into bite sized pieces. You can also choose to slightly mash the strawberries with a fork. If your strawberries are too tart, sprinkle some castor sugar on top of it and then mash.

To assemble, line up all the serving glasses. Add the biscuit mix to the bottom of the glass and gently press down. Now add in the jelly. Top with a big spoonful of strawberries followed by the cream mixture. Repeat the strawberry and cream layer until the glass is filled.


 Top with some grated chocolate if you like. Refrigerate and serve chilled.


Banoffee Pie


Anyone who has ever whipped up a banoffee pie knows that this dish is seriously simple, and unbelievably delicious. It is a wonderfully over-the-top dessert. It's crunchy, sticky, creamy, and so indulgent that it makes my mouth water just writing about it. Try it once, and it will soon become a real favourite for hassle-free entertaining.


Makes a 12" pie. Serves approx 10

2 cans of condensed milk
400gms biscuits (I recommend digestive biscuits, graham crackers or hob nobs)
100gms butter
5-7 bananas
200ml whipping cream


Fill a large pot with 3/4th of water and place over high heat. Once the water boils, submerge the cans of condensed milk. Ensure that the cans are fully immersed or it will end up exploding! Leave the cans to boil underwater for 2hrs. Remove from the water to let it cool.

Melt the butter. Crush the biscuits till a fine crumb. Now add the butter to the biscuit and combine. Transfer to your pie dish and press down to create an even base. Chill the tin in the fridge for 30mins.

The next layer of the banoffee pie is the best: sticky, caramel or toffee. The boiled condensed milk forms a thick, sticky, absolutely delicious toffee. Once cooled, spread the toffee evenly on top of the biscuit base.Thinly slice the bananas and lay them over the condensed milk toffee. Refrigerate for 20mins.

Pour whipping cream in a large bowl and whip till stiff. Spread the cream evenly on pie and refrigerate for another 30mins. Slice & serve. Its simply divine on its own, but if you are feeling indulgent, grate some chocolate on top and enjoy!


Note: Traditional banoffee pie calls for a shortcrust pastry base, but the biscuit base is popular for a reason. Not only is it delicious and adds some crunch, it also doesn't go soggy at the bottom and it helps cut the sweetness of the condensed milk

Tip: Tossing bananas in a little lemon juice makes the pie keep better and also lends a hint of tanginess to all the sweetness.

I'd also recommend add a dash of coffee to the cream as you are whipping it, to give some additional flavour


Peach Cobbler


The weather is so beautiful today and it got my baking juices flowing. I really didn't want to eat the cliched chai and pakoda. I wanted something warm and luscious. I had an abundance of fruit at home and fresh peaches were part of it. I love peaches, it one of my favourite fruits. I just love the smell, its is just...mmmm. These peaches were just begging to be given the royal treatment. So I decided to make a cobbler.


A cobbler is pie like filling topped with crumbs of dough. Think of it as a deconstructed pie. This recipe is so easy, and takes just 10 minutes to whip together (minus baking time). I think the hardest part of this recipe is waiting for it to finish baking. And the results are so delicious, imagine hot juicy peaches in their own syrup, with soft, crisp scone-like toppings...mouth drooling yet?


Adapted from the Brown Eyed Baker

Serves 6:

For the peach filling:

6-8 peaches, sliced
1 cup of sugar, preferably brown sugar
1 tsp ground nutmeg
1 tsp cinnamon powder
1 tbsp lemon juice
2 tbsp cointreau (optional)

For the topping:

1 cup all purpose flour
2 tsp baking powder
1 tsp sugar
1/2 cup unsalted butter, cold and cut into small cubes
A pinch of salt
1/2 cup milk


Preheat the oven to 170 degrees celsius.

In your baking dish, combine the peach filling ingredients and set aside.

In a large bowl, add the flour, baking powder, sugar and salt. Toss in the butter, and with your fingers, massage the butter into the flour. Mix till the mixture is crumby, like coarse meal. Pour the milk, and mix till just combined. The dough will seem wet and sticky, which is perfectly fine.

Drop this dough mixture all over the peach filling by the spoonful. Bake for 50-60mins or until the fruit is bubbling and the top forms a golden brown crust.


Best served warm with a scoop of vanilla ice cream.


Tiramisu


For those not in the know, Tiramisu is an Italian, coffee flavoured dessert. It is made from ladyfingers (not to be confused with okra or bhindi) dipped in coffee, layered with a whipped mixture of egg yolks, sugar & mascarpone (pronounced mah-scar-pone-nay) cheese.


It is one of my all time favourite desserts, I think slowly and steadily its over taking cheesecake to the number 1 slot. I judge restaurants and patisseries based on the tiramisu they make. When made right, there is nothing more orgasmic in your mouth than a tiramisu.


This dessert has been on my cooklist for months. Unfortunately, its ingredients were pretty expensive and not easy to come by. The main pillars of this dessert are macarpone cheese and ladyfingers. On my last trip to Goa, I stumbled upon ladyfingers at Newtons, and immediately snatched it up. Now all I needed was marscapone cheese and I was sorted with the basics.

Mascarpone cheese is an Italian cheese that is thick and soft and has a high fat content. This richness is essential to the tiramisu, and you can also use this cheese for cheesecakes or pasta sauce. Its easily available at Nature's Basket outlets, however, its so expensive (700 bucks for 250gms). That is, until I discovered a cheaper, Indian made brand. If you are trying out this dish, please buy La Cremella Mascarpone Cheese (also available at Nature's Basket). It cost 200 odd bucks for a quart. If it still seems expensive, you can try to make it at home.


P.S: This dessert couldn't have come to fruition without the help of my Sous Chef husband, so major credit goes to you Shrey Kamerkar.

500gms Mascarpone cheese
3 egg yolks
100gms Sugar
250ml Whipping cream
1 pack or approx 25-30 ladyfingers
1 cup brewed, lukewarm espresso (any black coffee with two teaspoon sugar)
1 cup Kahlua (optional)
Cocoa Powder to sprinkle on top

In a stand mixer, whip the whipping cream till double its volume. If you don't have a stand mixer, you can use the hand mixer or even whisk with your hands, however please note that it will take more time and energy. Now add the cheese and whisk for just one minute. It is crucial that you don't over whisk at this time as the cream might start to curdle. Once combined, set aside.

In a bowl add the egg yolks and sugar and whisk. Once fairly combined, place the bowl in a double boiler. Keep whisking while alternating the bowl on the heat and away from the heat. It is important to do this step carefully as prolonged exposure to the heat will cause the egg to scramble. Use your judgement, but for those who can't take a call, rule of thumb is for every minute you whisk the egg on the double boiler, whisk it for 3 mins away from the gas. Use mitts as you will be touching a hot bowl and going in and out of gas range. I know it sounds complicated, but this process is important to eliminate the risk involved in using raw eggs. Whisking the eggs and sugar will need a lot of elbow grease. The sugar must completely dissolve in the egg. You are looking for a sabayon consistency i.e: the egg will turn pale yellow and when you lift the whisk into the air, the mixture will fall back into the bowl in ribbons.

Now gently fold the egg mixture into the cream & cheese mixture and set aside. In another bowl, mix together the espresso and Kahlua. To build the tiramisu, quickly dunk the ladyfinger into the coffee liquid. It needs to be a quick dunk so as to not get it too soggy. Lay them side by side on the bottom of the serving bowl. Spoon a layer of the mascarpone mixture to evenly over the bowl. Repeat with another layer of ladyfinger and finally with another layer of mascarpone. Use a spatula or a butter knife to smoothen out the top layer and make it even.


Refrigeratefor atleast an hour before serving. Just before serving, sift a light, even dusting or cocoa powder over the top.


Note: The traditional recipe calls for only mascarpone cheese, but I've used a half & half mix of the cheese & whipped cream, solely so that it doesn't pinch my wallet. Incase you don't find whipping cream either, you can use the remaining egg whites (just ensure to whip it till its more that 3 times its volume and add in a little extra sugar)
Ladyfingers are sweet, spongecake-like biscuits, that are long and said to be shaped like fingers. Incase you don't find it, you can use basic vanilla sponge cake.


Tip: Mixing the coffee with any kind of liqueur gives this dessert a little oopmh and enhances the flavour. I've used Kahlua keeping with the coffee flavour of the tiramisu, but you can use dark rum, port, irish cream or brandy as well.


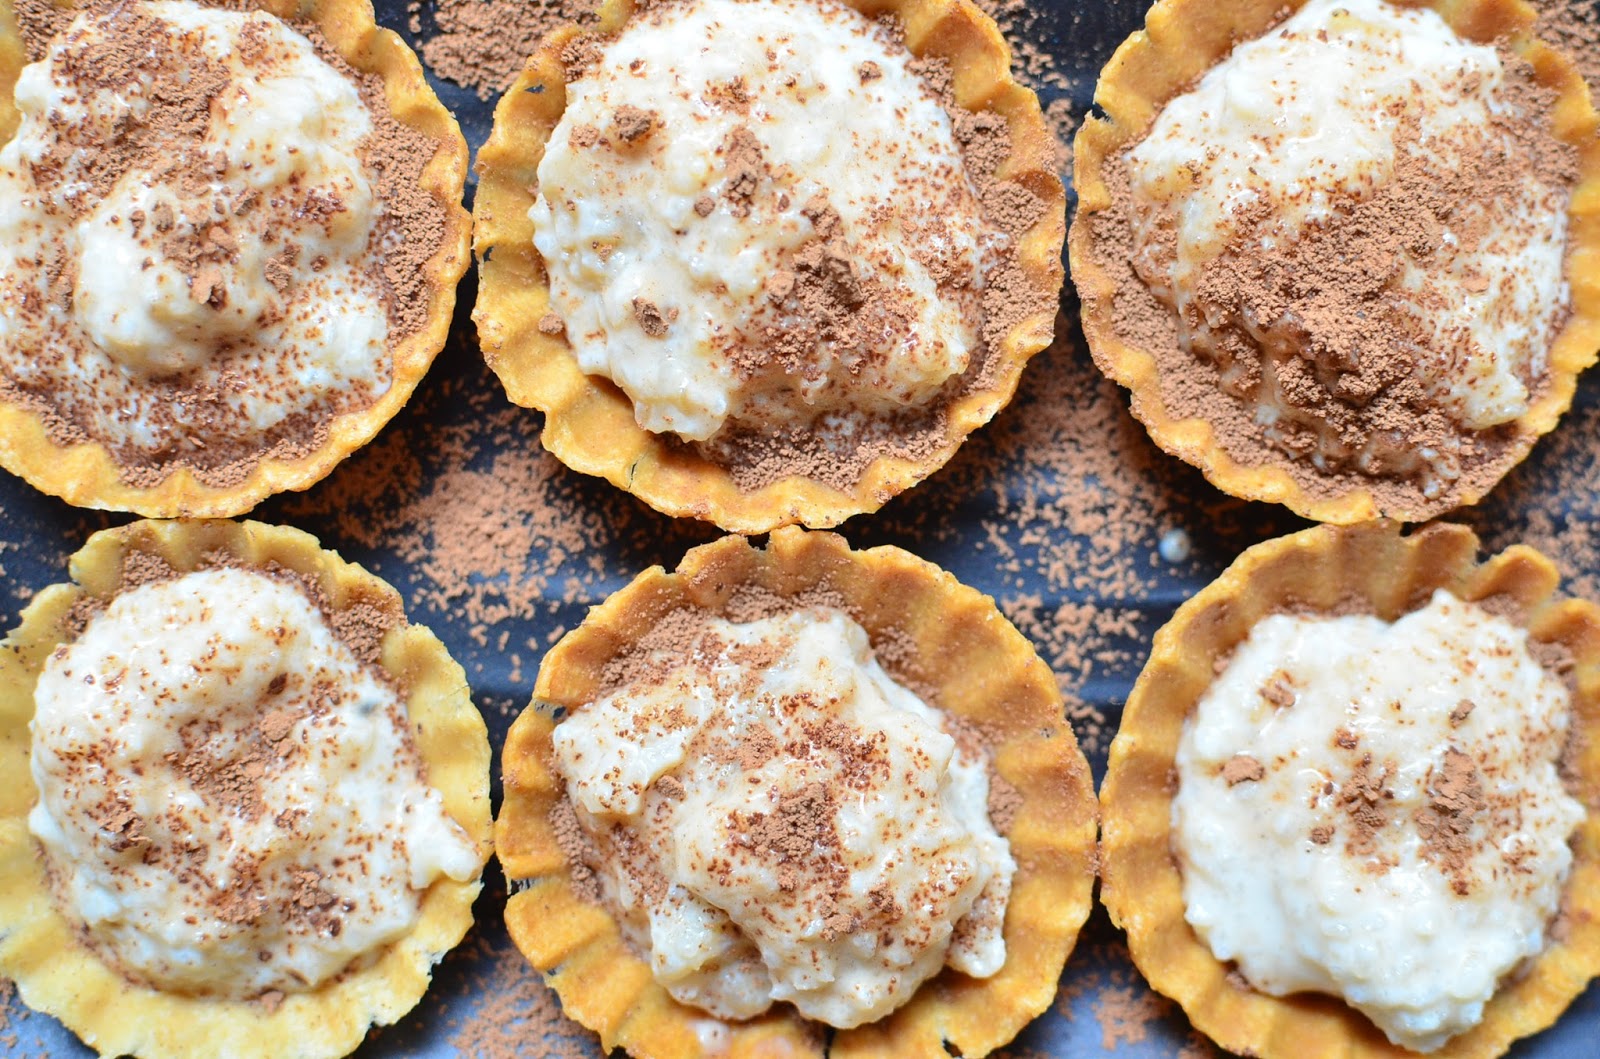
For portion control, you can also layer up in individual serving glasses. I've made a two layered dessert. Most restaurants serve a one layered version, but be generous to your family, more the layers, better the flavour.


No Bake Peanut Butter Pie


This is the last of my Vegan dessert recipes. Only two weeks to go (yay!). And peanut butter had to be it. After all, it is the world's most famous vegan ingredient. Also, a bite of this pie will make you believe that life outside chocolate truly does exist.


This pie is rich and creamy, and trust me its a real crowd pleaser. The filling has an almost ice cream like texture while the crust is crunchy like biscotti. And I'd like to think its one of the healthier desserts out there. Its vegetarian, vegan AND gluten free. I mean what more can you ask for?


Look how gooeyly delicious it looks!


Serves 8

Ingredients:

4 bananas (preferably the long green variety)
1 cup creamy peanut butter
1 tsp vanilla essence
1 tbsp honey
2 tbsp soy milk (or regular milk if you aren't vegan)

For the base
1 large pack or approx. 20 oreos
1 cup cashew nuts
3 tbsp Hershey's chocolate syrup
A pinch of salt


In a food processor, add all ingredients for the base and blitz. Blending time depends on the kind of crust you want. If you like really fine oreo and cashew bits, obviously it will take longer to blend in the processor. The mixture will form a 'dough' like appearance. You should be able to make a rough ball out of this mixture  i.e: it will hold together very well. Press this evenly in your pie dish to form the crust, and set aside.


To make the filling, blend all the other ingredients in food processor or hand mixer. All ingredients should be mixed and there should be no lumps. Pour this mixture into the pie dish. Refrigerate till set. Freeze for 4-6 hours or until firm.


Allow it to sit for 3-5 mins before serving.


Drizzle with Hershey's chocolate syrup or chopped up nuts to serve