Search This Blog

Showing posts with label No Bake. Show all posts

Vegan Pudding


Serves 4

1 cup non-dairy whipping cream*
2 tbsp Maple Syrup (use honey or sugar as substitute though it won't be vegan)
2 over ripe Bananas (preferably plantains)
100 gms Dark chocolate
200gms Oreos (optional)


*Almost all whipping cream available in the market is dairy free and soy based. And trust me it is lighter, lasts longer and tastes better than the dairy version. Popular brands include Rich's, Topolite, MerryWhip & GoldTop. They come in 1kg packs, and since it's not an everyday ingredient, I just divide the contents into individually portioned containers and freeze it. Ensure you write the serving size (1 cup, 1/2 etc) and the date on top of the container. When you need it, just thaw out one container in the refrigerator for a few hours.

In a small bowl, mash bananas so that no big chunks remain. You can use the blender to get a smooth puree if you prefer. In a blender or using a rolling pin, crush oreos till it crumbs and set aside (you can skip the oreo crust if you're not up for it...but seriously...should you?)

In a large bowl, pour in the whipping cream. Using a whisk or hand mixer, whip the cream till soft peaks form. Now drizzle the maple syrup and add the bananas. Fold in the bananas and maple syrup so as to not deflate the cream.

You can use individual glasses to portion or a large serving dish. To assemble, spread the oreo crumbs at the bottom, topped with the cream mixture. Alternately, you can build a trifle with layers of oreos, cream and mashed bananas. Refrigerate for 30min to an hour to cool the pudding. Grate dark chocolate on top and serve!


Chocolate P&B Squares


I've been out of action for a while. Between moving houses, buying appliances and painting walls, life just caught up with me. I got a brand new KitchenAid, but now I also have a tiny kitchen with absolutely no shelves. Get the joke?

Cooking and baking in a makeshift kitchen is a real challenge. But these Peanut Butter & Chocolate bars are almost too easy to be true. With just 5 ingredients, it's no bake, no cook and absolutely no fuss. All you need is a bowl. Obviously it helps to use a grinder to get biscuit crumbs, but elbow grease and a rolling pin don't disappoint either. And obviously it helps having a microwave to melt chocolate or butter, but Indian summers are just as effective.


Adapted from Buzzfeed

100 gms melted butter
400 gms digestive biscuits crumbed
2 cups creamy peanut butter + 2tbsps
50 gms powdered sugar
300 gms dark chocolate 

Line a pan (preferably 9"x9") with aluminium foil and set aside.

In a bowl, combine melted butter, peanut butter, sugar and biscuit crumbs. Stir till well combined. Spread the mixture evenly in the lined pan and refrigerate. While the peanut butter mix is chilling, melt the chocolate. Once melted, stir in 2tbsps peanut butter and mix till smooth. Spread evenly over the refrigerated P&B mixture. Chill until firm (approx. 1hr). Cut and serve!

For a vegan version of these bars, just substitute the butter for 2 tbsps of a neutral oil.

Tip: When the chocolate is melted, sprinkle a pinch of salt. Salt brings out the inherent sweetness of chocolate :)


Note: I've used very little sugar because I didn't want these bars to be overly sweet. Obviously, if you have a huge sweet tooth, feel free to add between 100-150gms sugar.


Chocolate Mousse


First post of 2015 had to be something sweet.


200gms chopped dark chocolate
3tbsp unsalted butter
1tsp vanilla essence
3 egg yolks
3 egg whites
3tbsp sugar
1/4tsp cream of tartar
1/4cup sugar
1/2cup whipping cream


In a large bowl melt the chocolate. You can melt chocolate in the microwave or a bain marie. For detailed instructions please refer to this page. Set aside.

In another heatproof bowl whisk together egg yolks and sugar (use powdered sugar if possible). Set the bowl in a double boiler and whisk constantly until thick and resembles a silky sauce. Remove from the water bath and whisk thoroughly into the melted chocolate. Do not wait for the egg to cool as it will scramble the mixture. Set aside to cool at room temperature.


In another large bowl, beat egg white until triple its volume so as its light and foamy. Add the cream of tartar and beat till peaks form. Incase you don't have cream of tartar, you can use a teaspoon of vinegar or omit it all together. Gradually beat in the sugar until the peaks are stiff.

Fold in the egg white mixture into the chocolate mix one quarter at a time.


In a smaller bowl, beat whipped cream till soft peaks form. Gently fold the cream in the chocolate mixture. Divide equally into bowls or ramkeins or even fancy martini glasses and refrigerate for 6hours or till the mousse is set.

Serve as is or with a dollop of whipped cream or white chocolate shavings.


Fudgey Walnut Toffee


The next few recipes come from my mother-in-law Sandra Kamerkar. She is a treasure trove of recipes and I'd be a fool to not share her cooking on the blog. I asked her to show me some traditional christmas sweets and this is the first thing she made. It's pretty easy to make, which is why its perfect for those trying out xmas sweets for the first time.

You only need 4 commonplace ingredients. The crunchy, fudgey texture is just a party in your mouth. And its so addictive! I can eat these like pop corn.  It's bite sized which makes a perfect edible gifting option.


1 can condensed milk*
1/2 tin sugar
1/2 tin full fat milk
1 tin chopped walnut
2tbsp cocoa powder

*I've used the empty condensed milk tin as a measure for the rest of the ingredients


Mix all ingredients (except the walnuts) in a pan on a low flame. Keep stirring gently till the mixture leaves the side of the pan. Now add the walnuts and stir to incorporate. Let it cool enough that you can touch it without burning your hands. Once it's manageable, roll into bite sized balls. The mixture needs to be shaped while still hot. Once it cools down it gets rock solid and completely unmanageable. Wrap in chocolate wrappers if you desire to gift.


Tip: You can add additional flavouring (like coffee) to the milk mixture to give this toffee some zing.


Banoffee Pie


Anyone who has ever whipped up a banoffee pie knows that this dish is seriously simple, and unbelievably delicious. It is a wonderfully over-the-top dessert. It's crunchy, sticky, creamy, and so indulgent that it makes my mouth water just writing about it. Try it once, and it will soon become a real favourite for hassle-free entertaining.


Makes a 12" pie. Serves approx 10

2 cans of condensed milk
400gms biscuits (I recommend digestive biscuits, graham crackers or hob nobs)
100gms butter
5-7 bananas
200ml whipping cream


Fill a large pot with 3/4th of water and place over high heat. Once the water boils, submerge the cans of condensed milk. Ensure that the cans are fully immersed or it will end up exploding! Leave the cans to boil underwater for 2hrs. Remove from the water to let it cool.

Melt the butter. Crush the biscuits till a fine crumb. Now add the butter to the biscuit and combine. Transfer to your pie dish and press down to create an even base. Chill the tin in the fridge for 30mins.

The next layer of the banoffee pie is the best: sticky, caramel or toffee. The boiled condensed milk forms a thick, sticky, absolutely delicious toffee. Once cooled, spread the toffee evenly on top of the biscuit base.Thinly slice the bananas and lay them over the condensed milk toffee. Refrigerate for 20mins.

Pour whipping cream in a large bowl and whip till stiff. Spread the cream evenly on pie and refrigerate for another 30mins. Slice & serve. Its simply divine on its own, but if you are feeling indulgent, grate some chocolate on top and enjoy!


Note: Traditional banoffee pie calls for a shortcrust pastry base, but the biscuit base is popular for a reason. Not only is it delicious and adds some crunch, it also doesn't go soggy at the bottom and it helps cut the sweetness of the condensed milk

Tip: Tossing bananas in a little lemon juice makes the pie keep better and also lends a hint of tanginess to all the sweetness.

I'd also recommend add a dash of coffee to the cream as you are whipping it, to give some additional flavour


Tiramisu


For those not in the know, Tiramisu is an Italian, coffee flavoured dessert. It is made from ladyfingers (not to be confused with okra or bhindi) dipped in coffee, layered with a whipped mixture of egg yolks, sugar & mascarpone (pronounced mah-scar-pone-nay) cheese.


It is one of my all time favourite desserts, I think slowly and steadily its over taking cheesecake to the number 1 slot. I judge restaurants and patisseries based on the tiramisu they make. When made right, there is nothing more orgasmic in your mouth than a tiramisu.


This dessert has been on my cooklist for months. Unfortunately, its ingredients were pretty expensive and not easy to come by. The main pillars of this dessert are macarpone cheese and ladyfingers. On my last trip to Goa, I stumbled upon ladyfingers at Newtons, and immediately snatched it up. Now all I needed was marscapone cheese and I was sorted with the basics.

Mascarpone cheese is an Italian cheese that is thick and soft and has a high fat content. This richness is essential to the tiramisu, and you can also use this cheese for cheesecakes or pasta sauce. Its easily available at Nature's Basket outlets, however, its so expensive (700 bucks for 250gms). That is, until I discovered a cheaper, Indian made brand. If you are trying out this dish, please buy La Cremella Mascarpone Cheese (also available at Nature's Basket). It cost 200 odd bucks for a quart. If it still seems expensive, you can try to make it at home.


P.S: This dessert couldn't have come to fruition without the help of my Sous Chef husband, so major credit goes to you Shrey Kamerkar.

500gms Mascarpone cheese
3 egg yolks
100gms Sugar
250ml Whipping cream
1 pack or approx 25-30 ladyfingers
1 cup brewed, lukewarm espresso (any black coffee with two teaspoon sugar)
1 cup Kahlua (optional)
Cocoa Powder to sprinkle on top

In a stand mixer, whip the whipping cream till double its volume. If you don't have a stand mixer, you can use the hand mixer or even whisk with your hands, however please note that it will take more time and energy. Now add the cheese and whisk for just one minute. It is crucial that you don't over whisk at this time as the cream might start to curdle. Once combined, set aside.

In a bowl add the egg yolks and sugar and whisk. Once fairly combined, place the bowl in a double boiler. Keep whisking while alternating the bowl on the heat and away from the heat. It is important to do this step carefully as prolonged exposure to the heat will cause the egg to scramble. Use your judgement, but for those who can't take a call, rule of thumb is for every minute you whisk the egg on the double boiler, whisk it for 3 mins away from the gas. Use mitts as you will be touching a hot bowl and going in and out of gas range. I know it sounds complicated, but this process is important to eliminate the risk involved in using raw eggs. Whisking the eggs and sugar will need a lot of elbow grease. The sugar must completely dissolve in the egg. You are looking for a sabayon consistency i.e: the egg will turn pale yellow and when you lift the whisk into the air, the mixture will fall back into the bowl in ribbons.

Now gently fold the egg mixture into the cream & cheese mixture and set aside. In another bowl, mix together the espresso and Kahlua. To build the tiramisu, quickly dunk the ladyfinger into the coffee liquid. It needs to be a quick dunk so as to not get it too soggy. Lay them side by side on the bottom of the serving bowl. Spoon a layer of the mascarpone mixture to evenly over the bowl. Repeat with another layer of ladyfinger and finally with another layer of mascarpone. Use a spatula or a butter knife to smoothen out the top layer and make it even.


Refrigeratefor atleast an hour before serving. Just before serving, sift a light, even dusting or cocoa powder over the top.


Note: The traditional recipe calls for only mascarpone cheese, but I've used a half & half mix of the cheese & whipped cream, solely so that it doesn't pinch my wallet. Incase you don't find whipping cream either, you can use the remaining egg whites (just ensure to whip it till its more that 3 times its volume and add in a little extra sugar)
Ladyfingers are sweet, spongecake-like biscuits, that are long and said to be shaped like fingers. Incase you don't find it, you can use basic vanilla sponge cake.


Tip: Mixing the coffee with any kind of liqueur gives this dessert a little oopmh and enhances the flavour. I've used Kahlua keeping with the coffee flavour of the tiramisu, but you can use dark rum, port, irish cream or brandy as well.


For portion control, you can also layer up in individual serving glasses. I've made a two layered dessert. Most restaurants serve a one layered version, but be generous to your family, more the layers, better the flavour.


No Bake Peanut Butter Pie


This is the last of my Vegan dessert recipes. Only two weeks to go (yay!). And peanut butter had to be it. After all, it is the world's most famous vegan ingredient. Also, a bite of this pie will make you believe that life outside chocolate truly does exist.


This pie is rich and creamy, and trust me its a real crowd pleaser. The filling has an almost ice cream like texture while the crust is crunchy like biscotti. And I'd like to think its one of the healthier desserts out there. Its vegetarian, vegan AND gluten free. I mean what more can you ask for?


Look how gooeyly delicious it looks!


Serves 8

Ingredients:

4 bananas (preferably the long green variety)
1 cup creamy peanut butter
1 tsp vanilla essence
1 tbsp honey
2 tbsp soy milk (or regular milk if you aren't vegan)

For the base
1 large pack or approx. 20 oreos
1 cup cashew nuts
3 tbsp Hershey's chocolate syrup
A pinch of salt


In a food processor, add all ingredients for the base and blitz. Blending time depends on the kind of crust you want. If you like really fine oreo and cashew bits, obviously it will take longer to blend in the processor. The mixture will form a 'dough' like appearance. You should be able to make a rough ball out of this mixture  i.e: it will hold together very well. Press this evenly in your pie dish to form the crust, and set aside.


To make the filling, blend all the other ingredients in food processor or hand mixer. All ingredients should be mixed and there should be no lumps. Pour this mixture into the pie dish. Refrigerate till set. Freeze for 4-6 hours or until firm.


Allow it to sit for 3-5 mins before serving.


Drizzle with Hershey's chocolate syrup or chopped up nuts to serve


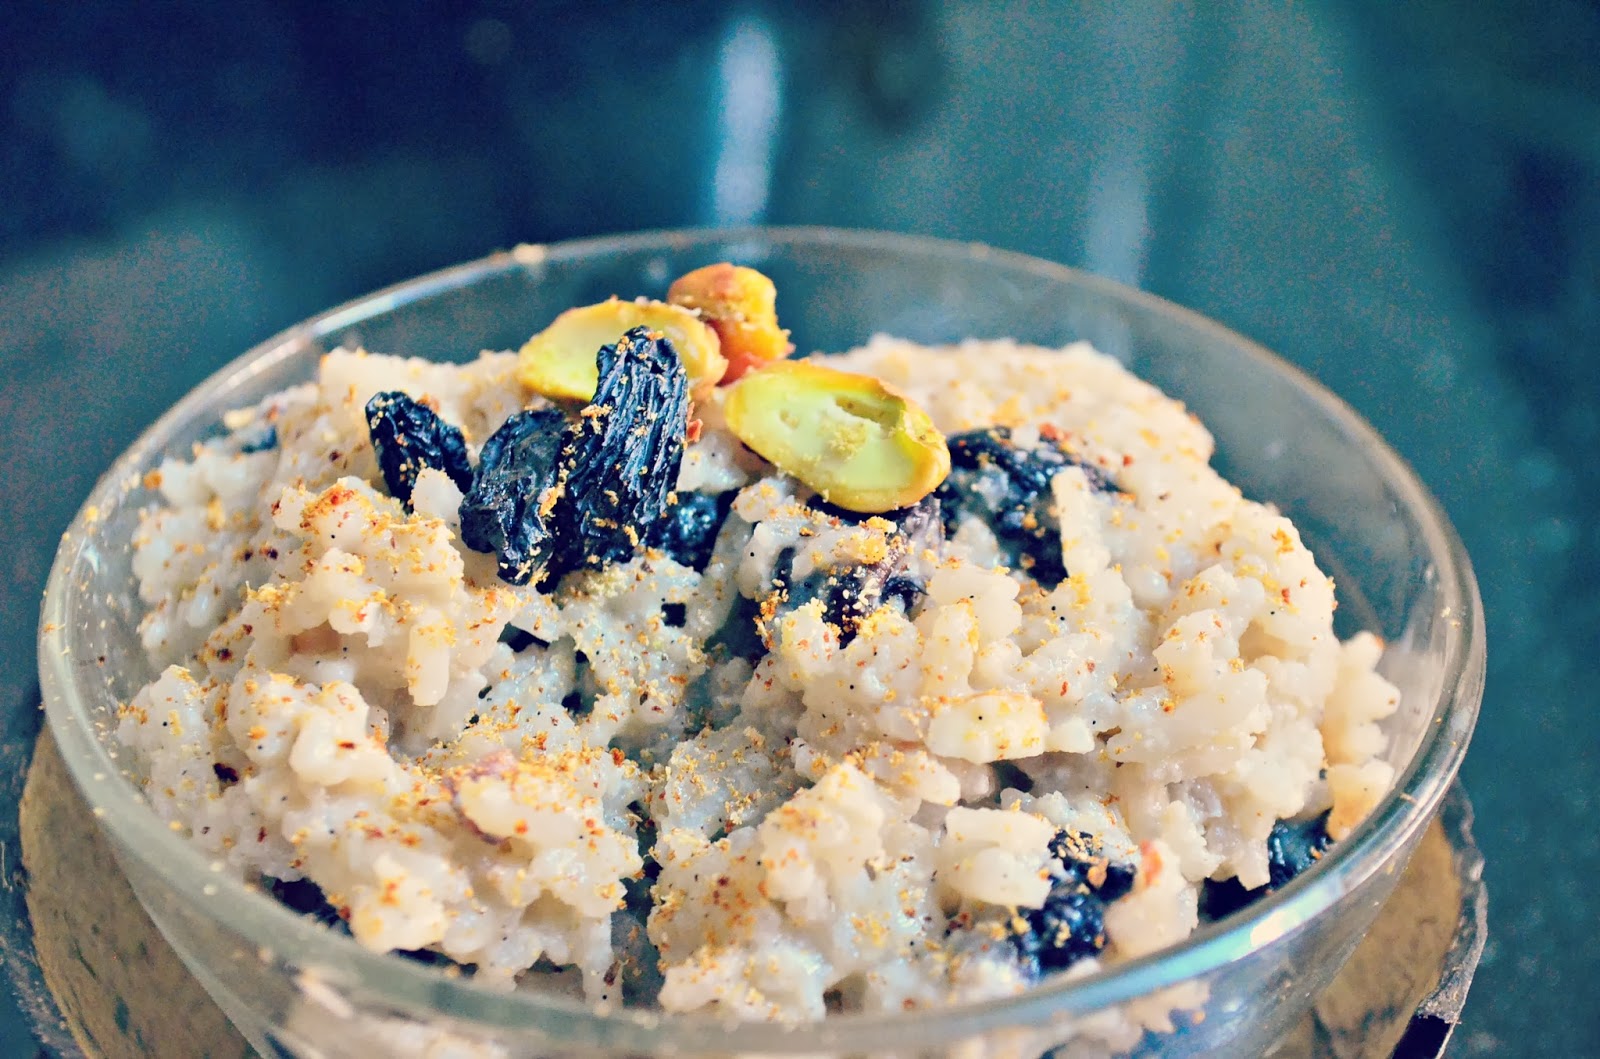
Creamy Coconut Milk Rice Pudding


So its my first recipe since going Vegan and naturally it had to be something sweet. I must admit, the thing I miss the most being vegan is dessert. I can live without meat for a while, but its getting increasingly hard to live without things that contain butter and milk.


Necessity is the mother of invention, and this dessert was born out of my pure craving for dessert. I think coconut milk is a must have in a vegan kitchen. Its incredibly rich and luscious, and a natural way to replace cream and milk in dessert. Ofcourse it will lend a coconutty flavour to everything. And it is rich in fat, making it not too healthy, even though it is natural fat.

This pudding is sweet enough to satisfy any craving and yet mild enough to make a snack. This dish is popularly called Kheer in India and every state, every household, has their version of making it. I'm going to jazz up my kheer with some alcohol...as usual! And I'm substituting regular milk with coconut milk, which isn't milk at all, but more like coconut pulp extract.


Serves 4

200ml coconut milk
1 cup Basmati rice
1 cup water
1/2 cup sugar
1 vanilla bean or 1tsp vanilla extract
2 tbsp of honey or maple syrup
2 pods of cardamom
1/2 tsp grated nutmeg
1 tsp powdered cinnamon
1 lemon's grated zest
A pinch of salt
A fist full of chopped nuts (I've used pistachios and almonds)
2 tbsp alcohol soaked raisins*

* For the raisins: Add a cup full of your favourite tipple in a saucepan and heat on a low flame. I used Limoncello as coconut and lime are a match made in heaven. Add the juice of 1 lemon. Add 2 tablespoon or a fistful of raisins. I used the black variant. Bring to the boil. Boil for 10 mins or until most of the alcohol has been absorbed by the raisins. The raisins will plump up with alcohol and is now ready to use.

In a medium sized pot, add in the water, coconut milk, vanilla extract, sugar, salt and rice. Bring to a boil, stirring occasionally, and then reduce to simmer. The rice will cook in the coconut milk and plump up by absorbing these juices. Keep a check on the rice and add more water or coconut milk if required. Halfway through the cooking process, add in the honey, nutmeg, cinnamon and cardamom. Simmer for 30mins or until the rice is fully cooked and absorbed all the liquid. Remove from heat and add in the raisins, nuts and lemon zest. Cool to room temperature before refrigerating.


Serve chilled with a dusting of cinnamon.


Chai Panacotta


Panna Cotta is an italian dessert of sweetened cream that is chilled and set with gelatin. The best way to describe it is also the worst way to describe it...it essentially a milk cream jelly...kinda like a cross between a pudding and custard. But the beauty of this dish is that its so incredibly easy to make. If it takes you more than 10mins to make, you are definitely doing something wrong.


Pannacotta is also very versatile. It gives a lot of leeway while cooking, and you can experiment infusing it with anything under the sun. Traditionally vanilla was infused...but that is so vanilla! Bad puns aside, I'm infusing mine with these fancy teas (early grey & english breakfast to be more specific) I got from a trip to London. You can obviously use regular tea bags. Also, how cute is the mug?!


Adapted from www.davidlebovitz.com

Makes enough for 4

1 cup fresh cream
1 cup milk
1/2 cup sugar
1 vanilla bean or 1 tsp vanilla essence
1 tbsp gelatin (see notes below on gelatin before using) 
2 tea bags (optional: If you don't like tea or just want to try making traditional pannacotta just skip the tea bags)


Heat the milk, cream and sugar in a saucepan. Ensure the heat is turned on low. Stir occasionally to ensure the sugar has dissolved. Once all ingredients are combined add in the vanilla extract. If using vanilla bean, cut the bean in half and scrape the seeds from (both sides of) the bean into the cream mix. The pod is also flavour, so toss the whole pod into the pan as well.

I used vanilla bean pod here and let me tell you, there is ABSOLUTELY no replacing it. The flavour you get with just one measly bean! An essence can never deliver the same flavour. So while it maybe expensive, for dishes like these I'd really recommend spending that extra 200 bucks. I got two beans in one tube. I used one for this dish and the other I mixed with my icing sugar bottle to make vanilla sugar. So there you go, it is definitely not a waste and definitely worth every penny.


I'm digressing! At this point add in the tea bags as well. Cover the pan and let it infuse on a low heat for 10 mins. The mixture shouldn't come to a boil. If you think it is going to start boiling, remove from heat and let it infuse on its own for 10 mins. Remove the tea bags and vanilla bean once infused. Taste to check if its yum. Pour gelatin into the hot pannacotta mix and stir till fully disolved.

Lightly oil cups or bowls with a neutral tasting oil (I used sunflower). Pour the mix in the cups and let them cool down to room temperature before chilling in the fridge. Chill overnight or until the gelatin sets.

Run a sharp knife around the edge of each panna cotta and unmold onto a serving plate. Serve as is or with summer berries.


Tip: If you are lazy like me or pressed for time, pour the panna cotta mixture into martini or wine glasses and chill so that you can serve them in the glasses without unmolding

P.S: I know you will say that my Panna Cotta looks 'dirty'. Those little polka dots are flecks of Vanilla beans and if u ask me, it looks prettier this way

Note: I have only used powdered gelatin so far, and to be honest I haven't found sheet gelatin anywhere in Mumbai

Sprinkle granules over the surface of cold water. I used 1 cup of water for 1tbsp of powdered gelatin. Do not dump them in water as the granules in the middle wont dissolve. Let it stand for 10 mins. Heat gently to ensure all granules are dissolved. It is now ready to be poured into the pannacotta mix.


Everyone needs a breakfast dessert. My breakfast cuppa has never been this good.