Search This Blog

Showing posts with label Christmas Cooklist. Show all posts

De-constructed Pavlova


I died, went to heaven and came back to ground reality all in one bite. There was just so much going on in one bite...so many textures, so many flavours and sensations.  Picture a crispy meringue shell with a marshmallow soft centre, luscious cream and a mountain of fresh fruit. It's such a graceful dessert, and yet so intoxicating. I'm addicted.


It's also a great hit at dinner parties for its novelty and easy to make recipe. You can easily portion them into glasses or small bowls for individual servings and you can make the meringues ahead of time.


Pavlovas are relatively easy to make and the ingredients are pantry staples. I have a confession to make however, I've tried to make meringues multiple times, but failed miserably. I tried whisking egg whites with my hands and progressed to using hand mixers, but nothing works except a stand mixer. If you don't own a stand mixer like KitchenAid, don't even try attempting this dish. But if you do own one, you can whip up this dessert in under 10mins (minus baking time).

Makes one large (approx 12") Pavlova

4 egg whites
250g castor sugar
1tsp vinegar
1tsp cornflour
1tsp vanilla extract

For the topping
5000gms stawberries, halved
3tbsp icing sugar
1tbsp balsamic vinegar (optional)
250ml cream
1tsp icing sugar

Pre-heat oven to 150C. In a stand mixer, whisk egg whites until they form stiff peaks. Now whisk in the sugar one tablespoon at a time, until the meringue looks glossy.


Whisk in the rest of the ingredients. To bake the pavlova use a silpat or line a baking tray with parchment paper. Spread the meingue in a circular fashion. Spread it such that the sides are a little higher than the middle.


Bake for 1hr and let the pavlova cool completely inside the oven.

For the topping:

Whisk cream with a pinch of icing sugar, till it swells up a bit. I don't recommend adding too much sugar to the cream as the meringue and strawberry mixture already contain quite a bit of sugar. The cream cuts the sweetness beautifully.

In a saucepan pan, add the halved strawberries with sugar. Heat on a low flame till the sugar dissolves, then bring to a simmer. Cover pan and cook for 2-3mins. Cool, and add balsamic vinegar if you like. What we've made here is a basic compote which can be stored for two weeks and can be used to top anything from pancakes and waffles, to scones, to even bread.

Once the meringue is cool, spread the cream over the meringue followed by the strawberries. Drizzle the strawberry syrup over the meringue and serve.


To serve as my de-constructed version, cut out part of the meringue and crush with your fingers to form rough sized crumbs. Drizzle cream on top of the crumbs and place individual pieces of strawberry on top. Bring it all together by drizzling some strawberry syrup.


I honestly find this de-constructed way the best way to serve. Its easier to portion out, plus less messy to cut.


P.S: I'm going to let you in on a discovery I made. I stored the leftover Pavlova over night and tried it the next day, and it tasted even better. Try eating your Pavlova cold rather than room temperature. The meringue has a beautiful silky, custard like taste and texture. It is beyond tasty.




Milk Cream

This Christmas sweet is always a winner. It's fudge like consistency and a biscotti flavour is a hit with everyone. And ofcourse, my mother-in-law makes it the best.

This melt in the mouth Milk Cream is a dream, but like all good things, it comes to those who wait and slog. It's tedious - make no mistake about that. This specific sweet demands a lot of elbow grease. Continuous stirring means that this recipe can get repetitive and monotonous, but wait till its done, you'll be grateful that you stuck it out till the end. It's amazing how with just 3 ingredients, one can whip up such delicious treats.


Recipe by Sandra Kamerkar:

1ltr milk
450gms sugar
100gms finely ground cashew nuts

On the lowest flame, bring the milk to boil (using a heavy bottomed non stick pan is the best). Keep stirring till the milk reduces to half it's quantity. This process usually takes atleast an hour. Add the sugar and keep stirring. The sugar will dissolve and the milk thickens further. Once the milk is thick i.e coats your spoon completely without falling like syrup, add the cashews. Keep cooking and stirring till the mixture thickens further and starts pulling away from the sides.


To test when its done, drop a bit in a cold water bowl. The mixture shouldn't separate/dissolve in water, and it should hold together i.e: you should be able to make a ball and it should be smooth and hold its shape. Alternately, you can stick your finger in the pan and the mixture shouldn't be sticky.

Take off the heat and remove in a bowl to cool and dry. Once cool, butter rubber moulds and mould the milk cream. If you don't have moulds, you can roll them into little balls. Or using an oiled rolling pin, roll it out and cut into squares.


Place on a tray and let it dry overnight. Store in an airtight container.

Note: I cannot stress the importance of stirring the mix continuously, failing to do so will burn the mixture. Do not take you eyes (or your spoon) off the mixture.


Once ready, the milk cream actually turns colour from white to off white or biscuity.


Fudgey Walnut Toffee


The next few recipes come from my mother-in-law Sandra Kamerkar. She is a treasure trove of recipes and I'd be a fool to not share her cooking on the blog. I asked her to show me some traditional christmas sweets and this is the first thing she made. It's pretty easy to make, which is why its perfect for those trying out xmas sweets for the first time.

You only need 4 commonplace ingredients. The crunchy, fudgey texture is just a party in your mouth. And its so addictive! I can eat these like pop corn.  It's bite sized which makes a perfect edible gifting option.


1 can condensed milk*
1/2 tin sugar
1/2 tin full fat milk
1 tin chopped walnut
2tbsp cocoa powder

*I've used the empty condensed milk tin as a measure for the rest of the ingredients


Mix all ingredients (except the walnuts) in a pan on a low flame. Keep stirring gently till the mixture leaves the side of the pan. Now add the walnuts and stir to incorporate. Let it cool enough that you can touch it without burning your hands. Once it's manageable, roll into bite sized balls. The mixture needs to be shaped while still hot. Once it cools down it gets rock solid and completely unmanageable. Wrap in chocolate wrappers if you desire to gift.


Tip: You can add additional flavouring (like coffee) to the milk mixture to give this toffee some zing.


Cinnamon Rolls & more

Sugar. Spice. And everything nice. These were the ingredients chosen to create the perfect little roll. My kitchen this week was transformed into the best smelling place on earth. Imagine the smell of warm freshly baked bread, fresh ground cinnamon and melting butter - it's probably what the evil witch used to lure Hansel and Gretel. Yep, sweet dreams are made of these.

And they taste as good as they smell. I'm guessing most people don't attempt making these at home thinking that they are just too much work and too time consuming. Well, think again. This dough is as easy to make as cake batter. Actually, minus the yeast, it practically is cake batter - flour, sugar, milk, butter, eggs.

I truly believed I had self control until I made these. It is just too irresistible and hence perfect to serve for breakfast on Christmas day. Just wait till you smell them baking,  it's probably what Santa's factory smells of. I want to bottle this scent and wear it forever!


Adapted from Epicurious.com

For the dough:

1 cup milk
3 tbsp unsalted butter
3 1/2 cups (plus more for rolling and dusting) all purpose flour
1/2 cup sugar
1 large egg
3tsp active dry yeast (if using the powder form double this quantity)
A pinch of salt

For the filling:

3/4 cup brown sugar
2 tbsp ground cinnamon
1/4 cup melted butter

For the glaze:

1 cup cream cheese
1tbsp milk or fresh cream
2 cup powdered sugar
1/4 cup melted butter
1 tsp vanilla essence
2 tbsp Amarula or any other liquor (optional)

Combine milk and butter in a bowl and microwave until the butter melts. The mixture should be warm and not piping hot. Pour into a large bowl. Add 1 cup flour, sugar, egg yeast and salt. Using your hands or a stand mixer stir to combine. Add the rest of the flour and mix till the flour is incorporated. The dough should be sticky but should also pull away from the sides of the bowl.

Lightly flour your kitchen work surface. Turn the dough out and knead until smooth and elastic. Add some more flour if the dough is too sticky. After kneading for about 5-8mins the dough should come together to form a smooth ball. Lightly oil a large bowl and transfer the dough, turning it to coat. Cover the bowl with cling film or a kitchen towel. Let it rise for approx 2 hours or until the dough is double in volume.

Punch down the dough gently with your knuckles. Transfer again to floured work surface. Roll the dough out to form a large rectangle. You can also cut out the dough to give the desired shape.


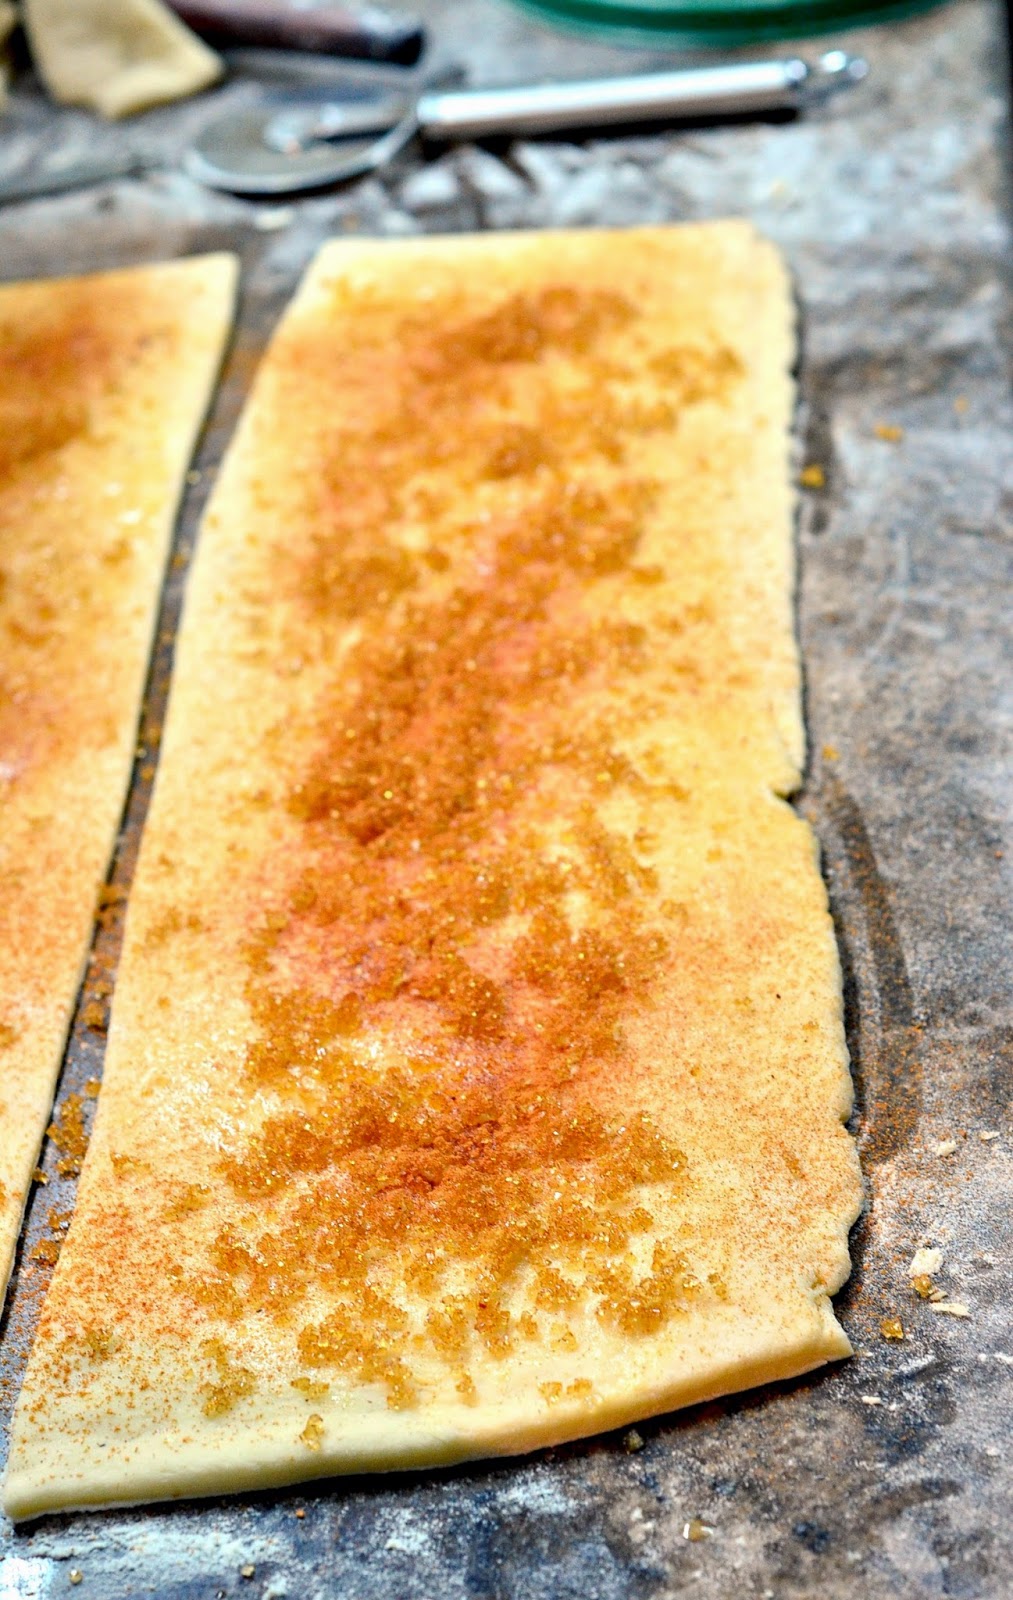
Now for the filling: spread butter over the dough. Mix brown sugar and cinnamon in a bowl. Sprinkle this cinnamon sugar evenly over the butter. Ensure that you leave 1/2 inch border. Roll the dough into a log. You can pinch it gently to keep it rolled up. with seam side down, cut the dough into 1/2inch to 1inch sized slices.


Grease your baking dish and arrange rolls cut side up. It is ok if there is barely any space between rolls. Cover the baking dish with cling film or a kitchen towel and let the dough rise again for 4-50mins.


Preheat the oven to 200°C. Bake rolls for approx 20 mins or until the tops are golden.


Remove from the oven and invert immediately onto a rack to cool. Once cooled, turn the rolls right side up.


For the glaze, beat all ingredients together until smooth. Drizzle on top of the rolls. Serve warm or at room temperature.


The best part is that I had a lot of trimmings left by cutting the dough to a rectangle. So I got to experiment with different fillings. Pictured here is a giant roll stuffed with some cherry jam that I had in my pantry.


Besides the classic cinnamon filling, I recommend trying chocolate chips, dessicated coconut, nuts, caramel or even fresh fruits.


FYI: Butter, eggs, milk and sugar slow down yeast activity. Regular bread rises quickly but since this roll involves all of the above, the bread may rise more slowly or not quite as much as usual. There is nothing wrong with the yeast or the bread, it's just that for recipes as rich as these, you just need patience :)


Eggs Benedict


How do you like your eggs?

If you have ever seen 'Runaway Bride' (and I'm sure you have, Richard Gere and Julia Roberts are almost impossible to resist), you must be familiar with Eggs Benedict. Not only is it Maggie Carpenter's (Julia Roberts) favourite way to eat eggs, it's also probably the most indulgent way to eat an egg. Picture this, crispy ham on a buttery toasted muffin...silky, poached egg slathered with a thick and luscious hollandaise sauce...drooling yet? Eggs Benedict is a breakfast classic and a perfect way to begin an indulgent day. For its pure decadence, I include this in my Christmas cooklist


Eggs Benedict has so many components, so much technique, that it can make it's way to a Masterchef Pressure Test. And because its full of so many moving parts, I'd almost never endeavour to make at home. I would file this dish right under Pavlova and Macaron in the list of things I'd rather leave to professional chefs. Which is why this dish is put together by Shrey.


Serves 1:

For the Hollandaise:

2 egg yolks
1tbsp lemon juice or vinegar
1/2cup butter
Salt and pepper to taste

For the Eggs Benedict:

2 rashes of bacon or ham
1 English muffin cut in half. I used a bagel instead. You can really use any type of bread
2 tsp white vinegar
2 eggs
Salt and pepper to taste
Hollandaise sauce
Parsley to garnish (optional)

Make the hollandaise sauce first:

Melt the butter in the microwave. In a bowl, beat together the rest of the ingredients. Next combine the melted butter with the eggs slowly and a little at a time (you'll probably need a little help at this stage). If you add the whole batch of melted butter, the eggs will curdle and you'll end up with a chunky sauce. Instead, slowly drizzle the melted butter in a thin stream, whisking the eggs the entire time. This technique is emulsification. You are looking for a smooth creamy sauce probably as thick as mayonnaise.


Cut the bagel in half and toast. Crisp up some bacon or ham in an oven or in a hot pan.

To poach eggs:

Half fill a non stick skillet with water. Add the vinegar and bring to a simmer. Break the eggs into two separate ramekins or bowls, taking care to not break the yolks. Gently tilt the bowl and let the egg slide out into the water. Repeat with the other egg as well. Reduce the heat to a gentle simmer

Cook for 2-3mins or until the egg white has set and the yolk remains soft. Remove with a slotted spoon.

Note: The vinegar is used to help coagulate the egg and helps it set faster. If you are tasting vinegar in the egg, then you've added too much


To assemble:

Lay the bacon slice on top of the bottom half of the bagel. I skipped using the meat completely as this dish is already pretty heavy. Gently place the poached eggs on top of the bacon. Season with salt and pepper. Spoon the hollandaise sauce over the eggs. Sprinkle some chopped parsley on top and enjoy!


Tip: Instead of hand whisking the hollandaise, put it in the blender.

To the eggs benedict hesitant: you can do it! The key is to prep everything before you start. Do your bacon in the oven, eggs on the stove, bread in the toaster and hollandaise in the blender. It's like conducting an orchestra, so many parts which come together so deliciously, its like music to your ears.

P.S: I like my eggs scrambled but I'm warming up to eggs benedict


Traditional Christmas Cake


Christmas is here!!! Well almost. And how can there be Christmas without cake. Baking the Christmas cake has always been a family tradition...after all the recipe has been passed on for generations. We all have our bits to play while making this cake. My job was to beat the egg whites till peaks form. Unfortunately I won't be sharing my family recipe this time. My family is in moaning, and there are no jingling bells at home this Xmas. I still however, insist on cake. So I'm adapting the recipe for Christmas cake from Nigella Lawson's How to be a domestic Goddess. And since it was a Christmas present from my fiancee, this post is dedicated to you Shrey.


You may remember my post on prepping for the Xmas cake. I promised a little short cut to all latecomers like me. The trick is to boil the fruits in your alcohol the night before. Let it cool sit for atleast 6hrs before you use it in your cake. I would ideally like to soak my fruits for atleast a month, some people soak it for months before christmas. I'd say that 6 months should be the ceiling limit, post which the fruits get so laden with alcohol that they come apart and kinda blend into the cake. So you lose the integrity of the fruit.

For the fruit:

My traditional mix involves raisins, currants and candied fruits and peel. I would however (if time permitted me to get my hands on them) add candied ginger, plums and cherries. But you can add any dry fruit or non citrusy fruit you like. My personal favorite (if they were easily available in my country) would be cranberries and prunes. For measurements and quantities Nigella has an amazing chart which you can use depending on how big or small a cake you want to make. Chop the fruit and put it into a huge Tupperware box. Add 1/2 bottle of dark rum or wine or whiskey or brandy. It may seem too much but over the course of the month, the fruits with soak it up. Cover fruits and store.

Tip: You can tip all the boozy fruits into that cake and save the liquid. You can use the spirit in frosting or drink it as your own special homemade christmas tipple.

For the cake:

I was making a big batch of cake, hence the large quantities. These measurements will make you two large cakes. For one big cake, just halve the measurements.


500gms plain flour
500gms unsalted butter at room temperature
300gms brown sugar
12 eggs
250ml molasses
2tsp ground cinnamon
2tsp ground nutmeg
1 1/2tsp baking powder
250gms walnut (optional)
250gms cashew (optional)
The fruit mix

In a large bowl, cream the butter and then add in the sugar. Once combined, add in the fruit mix and the nuts. Mix till combined and then add in the eggs. Now add the dry ingredients one by one starting with the spices and moving to the flour in the end. Mix till all ingredients are fully incorporated.

Preheat the oven to 180 degrees Celsius. Bake for 1hr and then turn down the heat to 150 degrees. bake for another 20 minutes or till a toothpick inserted in the middle comes out clean.

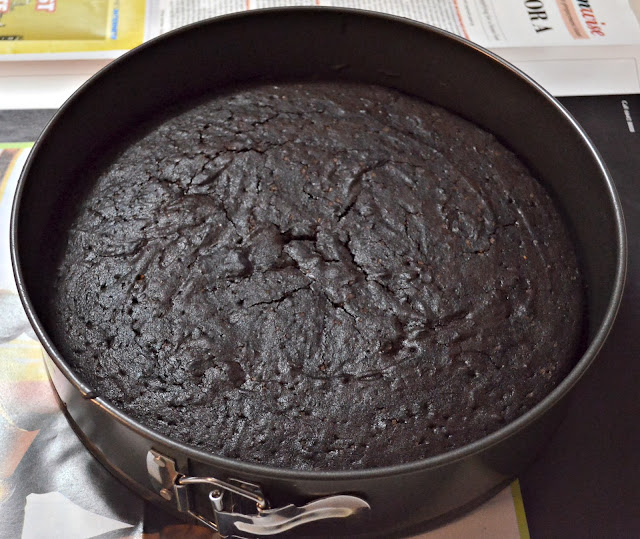
Will you look at that crust!

This cake will last you for several months. To enhance the boozy flavour, keep feeding the cake some alcohol every week (if it lasts that long!). Just use the same spirit you used in the cake and brush it over the cake. The cake will absorb the flavour.


Too keep the cake moist, wrap it in tin foil as soon as you bring it out of the oven. The foil will trap the steam, and give you a really moist cake. I like my cake fudgey with a nice crust on top as well, so I omitted this step. If you would like a crunchy crust on top, sprinkle the batter with sugar just before your pop it in the oven. The sugar on top caramelizes to give you a lovely golden crunch.


Gingerbread Cake

I have to admit, I have never eaten gingerbread before (yes..gasp!). So I'm not sure if I got this cake spot on, but going by the speed and intensity with which it was polished off, I'd say I did a pretty good job.

Most people make a gingerbread loaf, but I opted to make a 'cake' instead. Whats the difference you ask? Well for starters I used more egg, so my cake was fudgy. If you want to go the loaf way just use one egg.  I also frosted my cake. I read up on someones claim that this frosting is the only other frosting you will ever need. That'd you'd never make any other frosting again. Bold assertion. So I decided to hold her up to it. And it does make one mean icing. More details below:

Ingredients:


2 1/2 cups all purpose flour
1tsp ground cinnamon
2tsp ground ginger
1/2 tsp nutmeg
1 tsp cocoa powder
1 tsp baking soda
500gms unsalted butter at room temperature
1/2 cup granulated sugar
1/2 cup brown sugar
2 eggs
1/2 cup molasses or treacle
1/2 cup warm water
A pinch of salt
20ml coffee liqueur (optional)

I've got the basic recipe from here, but as you can see, I've modified the ingredients and proportions quite a bit. Instead of expresso powder I've used coffee liqueur and I've also added cocoa for a bit of colour and flavour. I've used just a small bit as I want it to act more as a spice, I don't want to end up making chocolate cake here. The cake gets its colour from molasses, by adding cocoa you are going to get a really really dark cake. So skip the cocoa if you don't want your cake to be too dark. And speaking of spices, since the frosting is really sweet, I doubled up the spice quantity for a nice hit. 

Preheat the oven to 175 degree celsius. In a bowl, mix your dry ingredients.

In another bigger bowl, cream the butter and add in both sugars. Mix till smooth. Add in the eggs and molasses and mix till combined.
Add 1/3 of the dry ingredients and mix. And 1/2 the water and mix. Repeat till you end with the last batch of dry ingredients. Incase you are using a stand mixer, mix at low speed. You should be looking at a nice luscious batter


Line your cake tin with butter and pour in batter. Bake for 30mins or until toothpick inserted at the centre of the cake comes out clean.


Look how beautiful that is! Leave it to cool, before icing. I also drizzled some Cointreau as soon as I pulled it out of the oven. Hot cakes absorb flavour better.


Tip: If you really want a nice spice hit to your cake, add a bit of ground pepper to the batter. Or add star anise for a liquorice taste.

Note: Traditional gingerbread has some element of lemon and/or orange in it in the form of zest and juice. If you are going for a loaf, I'd recommend you scrap the espresso and add the zest and juice of a lemon/orange.


Please don't mind my clumsy attempt at icing. I actually bought really fancy icing tools that gave up on me while icing this cake. Hence good ol' spatula to the rescue.


Cake Pops


Is it a cake? Is it a lollipop? Hell, its both those things!!! I think Cake Pops were the pioneers of hybrid desserts. In a world of Cronuts and Crownies, I still think these pops take the cake (pun intended). I mean what is there not to like? Its cake on a stick!

However having said that, I read up on a lot of 'easy' recipes and tutorials online before attempting mine....and they are not even remotely easy. Sure the recipe is simple...leftover cake and some chocolate. Sure its hardly 2-3 ingredients. But that is where the easy ends. Assembling these babies takes time, effort and a bucket load of patience. If you made these perfect at your first attempt, I must give you a standing ovation. I don't want to scare or discourage people from trying this out...it is a lot of fun! You get your hands smothered in chocolate, which you can later lick. But be prepared for your pops falling out, not coming together, not sticking etc. Like I said, you need a lot of patience. So if you are brave enough to try this out, here are my two cents:
  • Crumbing: Using your hands to break bits of cake and crumb it up the cake, is actually quite relaxing and a lot of fun. But if you don't want to get your hands dirty or are a tad bit OCD about crumb size, use a food processor or blender. It will break the cake into even crumbs with no chunks.
  • I didn't know this: You can melt chocolate in a microwave! Hallelujah! No more double boiler nonsense. Just roughly cut the chocolate and put in the your microwave at high heat. It takes all of two minutes!
  • Go easy on the chocolate: Now the cake is already moist (and like always, I added a dash of brandy in mine), so only add a little chocolate. The only job of the chocolate/ frosting is to bind the cake. So add a little and check out if the cake comes together. Adding too much will make your 'batter' moist and you will end up having to add more cake to balance it out.
  • If you do end up adding a lot of frosting/chocolate (like I did), put the cake in the fridge to cool so that the chocolate solidifies again and your mix will be easier to roll after. However, the only disadvantage to this is that once you remove the cake from the fridge, you have to work quickly else the chocolate will melt again and you are back to square one.
  • Use your hands: It helps to mix and roll the cake in your hands so that you can get a feel of it. When I used a spoon, I couldn't tell if I had put too much chocolate. It was when I touched it that I realized the 'dough' was too moist and I couldn't roll it into a ball.
  • Use ice cream scooper: This isn't mandatory, but use an ice cream scooper to scoop up the 'dough'. You will get neat and even balls. Not only does it save you a lot of effort, it will save you cleaning up time as well.
  • Use a deep narrow cup for dipping. The bowl should be deep enough to be able to dip the ball completely 
  • Use styrofoam (thermocol): A block of thermocol makes for a great holder to stick the pops in
  • And lastly, why stick to boring straws and skewers? Have your cake and eat the stick too. I got a little creative and used wafer roll sticks and candy canes. 
Since I went ahead and did my own thing, no credits for this post. For the Cake Pops you will need:

Cake (duh): Preferably old crumbly cake. I used my parents anniversary cake. It was a rich plum cake with some fondant that was lying in my fridge for over 6 months. Its perfect because it was rich and crumbly at the same time


Chocolate: I used dark chocolate to bind the cake and white chocolate as frosting to coat it.

Optional:
A dash of cream: I added this to the chocolate to make a ganache instead of just plain regular chocolate
Sprinkles etc to decorate the cake pops. I omitted this in my pop as it was already too rich.
A dash of booze for added flavour


Crumb the cake to workable bits. I added some rum at this point.


Add the melted chocolate


Combine together to form a rough 'dough'. Roll into bite sized balls. I used thick straws and edible wafers as holders and hence I went for larger balls. But if you are using lollipop sticks aim for smaller balls.


Dip sticks into melted chocolate and insert into the balls. The chocolate acts as glue. Don't insert the straw too deep or the ball would start to come undone.


Refrigerate until firm. Use this time to prep up other supplies. Warm your chocolate or make a ganache. Bring out the sprinkles.

Dip the pop in the melted chocolate. Allow excess chocolate to drip from the pop before putting them in a holder. Once the chocolate is set, they are ready to be served!

I was going for the whole 'north pole' theme, hence I've used wafers as sticks and my ganache is set only half way, giving a snow covered effect.


You can go crazy with these. You can use any flavoured cake, even leftovers. You can use butter, frosting or even oil as a binding agent for the cake. And obviously you can go crazy with toppings. My favourite place to gawk at cake pops is www.bakerella.com (she apparently invented it! such genius).