Search This Blog

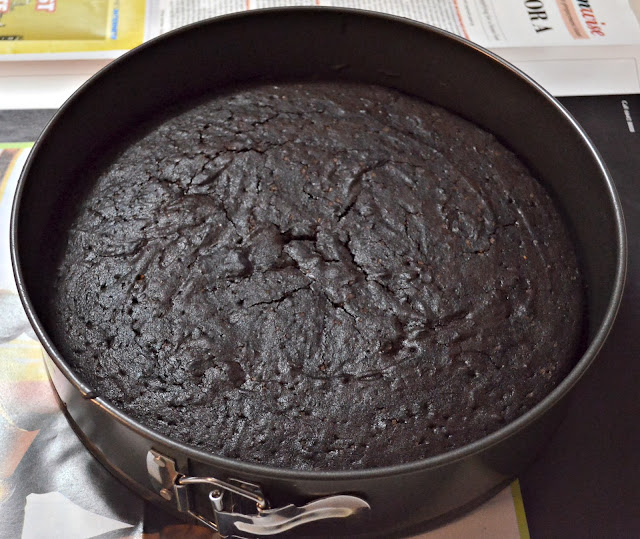
Two Ingredient Nutella Cake

Happy New Year Everyone!!!


As a prequel to my Nigella Lawson Project, I thought I'd keep it simple. I was invited to a friend's party and wanted something easy and quick to whip up. I had a jar of Nutella and this recipe at the back of my mind that I've been wanting to try out forever. I've been toying with the idea of a flourless cake for a while, and I think Nutella is the perfect ingredient.

Note: This was an experiment on my part with just a mix and match of ingredients in my head. I knew the basics about flourless cakes, but this recipe was a shot in the dark. But it did have amazing results. How can one ever go wrong with Nutella?

My tips on making this recipe:
  • DONT CHEAT. There are only two ingredients and it is easy to make. It takes 10 minutes to make the batter, but if you try to simplify it or lose patience with the eggs you will end up will poor results.
  • The key to the cake is the whipping of the eggs. The egg whites must be whipped to death. This is what creates the texture of the cake and prevents it from being 'eggy'.
  • Warm up the nutella to make it a little runny, but not too hot or your eggs will cook up
  • When you fold in the eggs and Nutella, it needs to be done in batches to avoid deflating the egg mix


Ingredients:
4eggs (separated)
Half a jar of Nutella

Preheat the oven to 175 degrees celsius.  In a big bowl, whisk the egg whites till extremely fluffy. I'd suggest you use a stand mixer or a hand mixer, just plain elbow grease won't do the trick. You are looking at a nice thick, silky smooth consistency that is atleast three times the volume.

Microwave the nutella to make it a little softer. Beat the egg yolks and add that to the nutella. Whisk together to form a smooth paste. Add 1/4 of the egg whites and gently fold into the chocolate mix. Repeat till the mix is fully incorporated.

Pour batter into tin and bake for 30 mins or until a toothpick inserted at the centre comes out clean. Let cake cool, dust with icing sugar and serve.


Note: since no flour is use, the texture of this 'cake' is more marshmallowy


Traditional Christmas Cake


Christmas is here!!! Well almost. And how can there be Christmas without cake. Baking the Christmas cake has always been a family tradition...after all the recipe has been passed on for generations. We all have our bits to play while making this cake. My job was to beat the egg whites till peaks form. Unfortunately I won't be sharing my family recipe this time. My family is in moaning, and there are no jingling bells at home this Xmas. I still however, insist on cake. So I'm adapting the recipe for Christmas cake from Nigella Lawson's How to be a domestic Goddess. And since it was a Christmas present from my fiancee, this post is dedicated to you Shrey.


You may remember my post on prepping for the Xmas cake. I promised a little short cut to all latecomers like me. The trick is to boil the fruits in your alcohol the night before. Let it cool sit for atleast 6hrs before you use it in your cake. I would ideally like to soak my fruits for atleast a month, some people soak it for months before christmas. I'd say that 6 months should be the ceiling limit, post which the fruits get so laden with alcohol that they come apart and kinda blend into the cake. So you lose the integrity of the fruit.

For the fruit:

My traditional mix involves raisins, currants and candied fruits and peel. I would however (if time permitted me to get my hands on them) add candied ginger, plums and cherries. But you can add any dry fruit or non citrusy fruit you like. My personal favorite (if they were easily available in my country) would be cranberries and prunes. For measurements and quantities Nigella has an amazing chart which you can use depending on how big or small a cake you want to make. Chop the fruit and put it into a huge Tupperware box. Add 1/2 bottle of dark rum or wine or whiskey or brandy. It may seem too much but over the course of the month, the fruits with soak it up. Cover fruits and store.

Tip: You can tip all the boozy fruits into that cake and save the liquid. You can use the spirit in frosting or drink it as your own special homemade christmas tipple.

For the cake:

I was making a big batch of cake, hence the large quantities. These measurements will make you two large cakes. For one big cake, just halve the measurements.


500gms plain flour
500gms unsalted butter at room temperature
300gms brown sugar
12 eggs
250ml molasses
2tsp ground cinnamon
2tsp ground nutmeg
1 1/2tsp baking powder
250gms walnut (optional)
250gms cashew (optional)
The fruit mix

In a large bowl, cream the butter and then add in the sugar. Once combined, add in the fruit mix and the nuts. Mix till combined and then add in the eggs. Now add the dry ingredients one by one starting with the spices and moving to the flour in the end. Mix till all ingredients are fully incorporated.

Preheat the oven to 180 degrees Celsius. Bake for 1hr and then turn down the heat to 150 degrees. bake for another 20 minutes or till a toothpick inserted in the middle comes out clean.

Will you look at that crust!

This cake will last you for several months. To enhance the boozy flavour, keep feeding the cake some alcohol every week (if it lasts that long!). Just use the same spirit you used in the cake and brush it over the cake. The cake will absorb the flavour.


Too keep the cake moist, wrap it in tin foil as soon as you bring it out of the oven. The foil will trap the steam, and give you a really moist cake. I like my cake fudgey with a nice crust on top as well, so I omitted this step. If you would like a crunchy crust on top, sprinkle the batter with sugar just before your pop it in the oven. The sugar on top caramelizes to give you a lovely golden crunch.


100 Days Of Nigella...My New Years Resolution

The Nigella Lawson Project:

Most new year resolutions include losing weight, cutting out the sweets and the baked goods, not binging and the likes. So here I am doing the complete opposite.

I've always said, I'm more baker than cook. Baking is my first love, its my true calling. And Nigella Lawson played cupid. Don't you just love her? Her shows are essential to anyone who enjoys procrastination of the culinary kind. And what I love best about her is that she's not a 'chef'.  And as a host, she doesn't issue 'matronly' instructions. She's self taught, and almost goofy around the kitchen...just like me. She eats...good things and bad things. And best of all...she has hips! Its not just about the cooking, its about the enjoyment of being in the kitchen and getting your hands dirty, taking pleasure in the entire process, and relishing the outcome.

In my beef bourguignon post previously, I have ranted on and on about Julie and Julia and how much I like the whole concept of cooking out one's idol. So this Christmas my fiancee gifted me a copy of How To Be A Domestic Goddess and I thought why not?

The Plan...

Now I'm not so ambitious as to have a 365 day bake-a-thon. I do have a day job AND my own wedding to plan....and multitasking is not a quality I possess. Hence the 100 days of Nigella Project. Why 100 you may ask. There are approximately 50 weekends in 2014 which makes 100 days. So my aim is to cook out 100 recipes from the book over the 50 weekends in 2014 (I may skip a few weekends due to said wedding which I will make up for, don't you worry!). The book is divided into nine chapters: Cakes, Biscuits, Pies, Puddings, Chocolate, Children, Christmas, Bread & Yeast. Mind you I live in India so not all ingredients are easy to come by, hence I will cherry pick the easy recipes and dish those out.

So that is pretty much my rules. I'd love to hear your comments on the over the course of the year.

Wish me luck!


Gingerbread Cake

I have to admit, I have never eaten gingerbread before (yes..gasp!). So I'm not sure if I got this cake spot on, but going by the speed and intensity with which it was polished off, I'd say I did a pretty good job.

Most people make a gingerbread loaf, but I opted to make a 'cake' instead. Whats the difference you ask? Well for starters I used more egg, so my cake was fudgy. If you want to go the loaf way just use one egg.  I also frosted my cake. I read up on someones claim that this frosting is the only other frosting you will ever need. That'd you'd never make any other frosting again. Bold assertion. So I decided to hold her up to it. And it does make one mean icing. More details below:

Ingredients:


2 1/2 cups all purpose flour
1tsp ground cinnamon
2tsp ground ginger
1/2 tsp nutmeg
1 tsp cocoa powder
1 tsp baking soda
500gms unsalted butter at room temperature
1/2 cup granulated sugar
1/2 cup brown sugar
2 eggs
1/2 cup molasses or treacle
1/2 cup warm water
A pinch of salt
20ml coffee liqueur (optional)

I've got the basic recipe from here, but as you can see, I've modified the ingredients and proportions quite a bit. Instead of expresso powder I've used coffee liqueur and I've also added cocoa for a bit of colour and flavour. I've used just a small bit as I want it to act more as a spice, I don't want to end up making chocolate cake here. The cake gets its colour from molasses, by adding cocoa you are going to get a really really dark cake. So skip the cocoa if you don't want your cake to be too dark. And speaking of spices, since the frosting is really sweet, I doubled up the spice quantity for a nice hit. 

Preheat the oven to 175 degree celsius. In a bowl, mix your dry ingredients.

In another bigger bowl, cream the butter and add in both sugars. Mix till smooth. Add in the eggs and molasses and mix till combined.
Add 1/3 of the dry ingredients and mix. And 1/2 the water and mix. Repeat till you end with the last batch of dry ingredients. Incase you are using a stand mixer, mix at low speed. You should be looking at a nice luscious batter


Line your cake tin with butter and pour in batter. Bake for 30mins or until toothpick inserted at the centre of the cake comes out clean.


Look how beautiful that is! Leave it to cool, before icing. I also drizzled some Cointreau as soon as I pulled it out of the oven. Hot cakes absorb flavour better.


Tip: If you really want a nice spice hit to your cake, add a bit of ground pepper to the batter. Or add star anise for a liquorice taste.

Note: Traditional gingerbread has some element of lemon and/or orange in it in the form of zest and juice. If you are going for a loaf, I'd recommend you scrap the espresso and add the zest and juice of a lemon/orange.


Please don't mind my clumsy attempt at icing. I actually bought really fancy icing tools that gave up on me while icing this cake. Hence good ol' spatula to the rescue.


Cake Pops


Is it a cake? Is it a lollipop? Hell, its both those things!!! I think Cake Pops were the pioneers of hybrid desserts. In a world of Cronuts and Crownies, I still think these pops take the cake (pun intended). I mean what is there not to like? Its cake on a stick!

However having said that, I read up on a lot of 'easy' recipes and tutorials online before attempting mine....and they are not even remotely easy. Sure the recipe is simple...leftover cake and some chocolate. Sure its hardly 2-3 ingredients. But that is where the easy ends. Assembling these babies takes time, effort and a bucket load of patience. If you made these perfect at your first attempt, I must give you a standing ovation. I don't want to scare or discourage people from trying this out...it is a lot of fun! You get your hands smothered in chocolate, which you can later lick. But be prepared for your pops falling out, not coming together, not sticking etc. Like I said, you need a lot of patience. So if you are brave enough to try this out, here are my two cents:
  • Crumbing: Using your hands to break bits of cake and crumb it up the cake, is actually quite relaxing and a lot of fun. But if you don't want to get your hands dirty or are a tad bit OCD about crumb size, use a food processor or blender. It will break the cake into even crumbs with no chunks.
  • I didn't know this: You can melt chocolate in a microwave! Hallelujah! No more double boiler nonsense. Just roughly cut the chocolate and put in the your microwave at high heat. It takes all of two minutes!
  • Go easy on the chocolate: Now the cake is already moist (and like always, I added a dash of brandy in mine), so only add a little chocolate. The only job of the chocolate/ frosting is to bind the cake. So add a little and check out if the cake comes together. Adding too much will make your 'batter' moist and you will end up having to add more cake to balance it out.
  • If you do end up adding a lot of frosting/chocolate (like I did), put the cake in the fridge to cool so that the chocolate solidifies again and your mix will be easier to roll after. However, the only disadvantage to this is that once you remove the cake from the fridge, you have to work quickly else the chocolate will melt again and you are back to square one.
  • Use your hands: It helps to mix and roll the cake in your hands so that you can get a feel of it. When I used a spoon, I couldn't tell if I had put too much chocolate. It was when I touched it that I realized the 'dough' was too moist and I couldn't roll it into a ball.
  • Use ice cream scooper: This isn't mandatory, but use an ice cream scooper to scoop up the 'dough'. You will get neat and even balls. Not only does it save you a lot of effort, it will save you cleaning up time as well.
  • Use a deep narrow cup for dipping. The bowl should be deep enough to be able to dip the ball completely 
  • Use styrofoam (thermocol): A block of thermocol makes for a great holder to stick the pops in
  • And lastly, why stick to boring straws and skewers? Have your cake and eat the stick too. I got a little creative and used wafer roll sticks and candy canes. 
Since I went ahead and did my own thing, no credits for this post. For the Cake Pops you will need:

Cake (duh): Preferably old crumbly cake. I used my parents anniversary cake. It was a rich plum cake with some fondant that was lying in my fridge for over 6 months. Its perfect because it was rich and crumbly at the same time


Chocolate: I used dark chocolate to bind the cake and white chocolate as frosting to coat it.

Optional:
A dash of cream: I added this to the chocolate to make a ganache instead of just plain regular chocolate
Sprinkles etc to decorate the cake pops. I omitted this in my pop as it was already too rich.
A dash of booze for added flavour


Crumb the cake to workable bits. I added some rum at this point.


Add the melted chocolate


Combine together to form a rough 'dough'. Roll into bite sized balls. I used thick straws and edible wafers as holders and hence I went for larger balls. But if you are using lollipop sticks aim for smaller balls.


Dip sticks into melted chocolate and insert into the balls. The chocolate acts as glue. Don't insert the straw too deep or the ball would start to come undone.


Refrigerate until firm. Use this time to prep up other supplies. Warm your chocolate or make a ganache. Bring out the sprinkles.

Dip the pop in the melted chocolate. Allow excess chocolate to drip from the pop before putting them in a holder. Once the chocolate is set, they are ready to be served!

I was going for the whole 'north pole' theme, hence I've used wafers as sticks and my ganache is set only half way, giving a snow covered effect.


You can go crazy with these. You can use any flavoured cake, even leftovers. You can use butter, frosting or even oil as a binding agent for the cake. And obviously you can go crazy with toppings. My favourite place to gawk at cake pops is www.bakerella.com (she apparently invented it! such genius).

Eggnog

There are obviously tons of recipes online on eggnog, but I find this recipe to be the simplest. My dad loves to mix cocktails, and being the festive season, we thought this is something we could try together. This recipe is for a single glass of eggnog...and ofcourse I did experiment with different versions and different measure. Here is my favourite version:

Ingredients:


1 egg yolk
50ml cream
1cap of rum or bourbon
Sugar syrup according to taste
Nutmeg or cinnamon to garnish


Combine everything in a shaker and dry shake for ~10seconds. Add ice and then shake again. Strain and garnish with nutmeg or cinnamon.

Tip: You can use any dark spirit. Trust me, don't bother with 'white' spirits. Leave your vodka, gin and white rum for a different cocktail. Avoid cream based liqueurs too as the recipe already calls for cream and your overall mix will be too heavy.


Coming Soon!

I'm sorry for being M.I.A for a while...my kitchen is in the midst of a makeover. But Christmas is almost here, and I'm not going to miss out on all the baking fun! So better late than never right?


I have finally soaked my fruits for the traditional Christmas Cake. Seen here, I'm using black currents and candied fruit and peels soaked in dark rum. I would have ideally also liked to add cherries to this soaking as well. But like all my cooking methods, this is a cheats version as it drastically cuts down the variety of dry fruits used. So while still staying true to the time honoured Christmas Cake, I'm cutting down my costs and efforts by half.


Like I mentioned, since I'm late, I also have a neat trick up my sleeve to ensure the fruits and the cake retains the boozy flavour. Watch this space for more!

Instant Buttermilk Substitue

Most baking recipes call for buttermilk. Don't have buttermilk handy? No problem! Since I live in India, buttermilk usually sold here is the spiced, flavoured versions (masala chaas). That doesn't mean you abandon the ingredient all together.

Here are a few substitutions which are just as good:

Lemon Juice/ Vinegar:
The trick is to add 1tsp of lemon juice or white vinegar to 1 cup of whole milk. Stir well and let it sit for two minutes. The acid will sour the milk, making it the perfect substitute. Even though it won't be as thick as the commercial ones you find abroad, its the closest you will come to the real thing.

Yoghurt:

This is my fail safe substitue. I use this more than any other variation I've written here. Mix 3/4 parts yoghurt with 1/4 parts milk and beat till combined and smooth.

Cream of Tartar:

Mix 1 cup milk with 1 1/2 teaspoon of cream of tartar. Make sure you stir till there are no lumps


Spaghetti & Meatballs

This is such a great comfort food. And its a winner with kids too. I had made a killer pot of Marinara Sauce and had some minced meat. What better way to use the two that to make Spaghetti with Meatballs.

I've already shared the recipe for my Marinara sauce and the Meatballs, so there really isn't much for me to do here except bring them all together. This recipe works for approx. 300gms of Spaghetti.

Cook the pasta al dente and drain. I have a bottle of beautiful truffle oil which I recently bought from my European adventures. I've used some of that truffle oil and drizzled over my Spaghetti. You can use some garlic oil instead. Plate up the pasta using this neat twirl trick. Add a dollop of the Marinara sauce and a few meatballs. Enjoy!


Meatballs

These meatballs with my marinara sauce...are a match made in Spaghetti heaven. Details below:


Ingredients:

1 cup minced meat. I used beef but pork would do just fine.
1 Onion diced
3 cloves of Garlic preferably grated
1 cup Breadcrumbs
Salt and pepper to taste

Mix all ingredients except the breadcrumbs. Now slowly add the breadcrumbs, little by little, mixing till all the ingredients come together to form a ball. Now roll the meat mixture to bite size balls and fry till golden brown.


Julia Child's Beef Bourguignon

I never really understood what the fuss is about Beef Bourguignon....until I tried it myself!! On a recent girlfriend getaway to Paris, a local and a friend recommended that me and the girls try out the Beef Bourguignon at this quaint Parisienne place called Le Petit Saint Benoit. And since then, I just cannot get the flavour out of my head.

So one day after watching Julie & Julia, I finally mustered up the courage to try this rich beef stew. And who better to guide me that Julia Child. Now unfortunately, she doesn't have her own official site or a collection of recipes online. So I've used this BLOG and followed it to a T. She herself claims to have copied it from the original Julia Child recipe, and it does make a mean stew. So today I'm not going to type out the recipe, just going to rant out how good it is.

Beef Bourguignon is a labour of love. It will take you all day (and a whole bottle of wine!) to make this one dish wonder, but when you try it for the first time, you won't believe your mouth. So please have patience, it is definitely worth toiling for. It is also a dish that tastes better when shared, so make sure you have a dinner party to celebrate. Traditionally served with fresh, warm crusty Baguette (Oh how I wish I was back in Paris), but I've used mashed potatoes instead.

Served best with a glass of the best red wine and the movie Julie & Julia. Bon Appetite!!!


Marinara Sauce (cheat's version)

I once read that Marinara sauce is the culinary version of the little black dress - and I completely agree! It can be dressed up or down with such ease. And my marinara sauce is so simple and quick, you'll never want to buy that jarred stuff again.

Ingredients:


Makes a potful, enough to lusciously coat 300gms of Spaghetti

3 Fresh Ripe Tomatoes
2 cups of Tomato Purée
6 cloves of Garlic
2 Bay Leaves
2 teaspoons of basil or mixed herbs (Note: there is ABSOLUTELY no replacing fresh basil, but since this is a cheats version, I'm allowing myself to use dried herbs)
2 tablespoons of Olive oil
Salt & Pepper to Taste

Finely chop the garlic. I've used 6 cloves as I like a nice garlic hit, but you can use 2 cloves for a really mild flavour. You can use a dozen tomatoes and purée them or you can use a combination fresh tomatoes and ready made tomato purée like I did. I chopped the fresh tomatoes, skins and all, and bashed them in a mortar and pestle. Warning: tomatoes will squirt so please wear an apron.

In a heavy bottomed pan, add some olive oil and garlic (If you are making pasta, now is the time to put your salted water on the pan). Once the garlic is soft, add in the tomatoes along with the purée. Add the bay leaf and basil and let them poach till the sauce thickens and boils gently. If your sauce is too thick, add in some pasta water. Add salt and pepper to taste. Remove the bay leaves and voila! Your sauce is now ready!

Serving:
I can write a book on uses of marinara sauce! Marinara sauce is the foundation of many a good Italian meals. You can use it for pizzas, risottos, calzones and pastas. Add in anchovies, capers and olives for a quick Puttanesca. To add some depth and flavour, add a rash of bacon while the sauce is boiling. But today I'm going to use it to make traditional Spaghetti and Meatballs.

Tip: If the sauce is too tangy or tart, add in a pinch of sugar to balance it out. I also like to add some wine or balsamic vinegar to give the sauce a little zing.


Note: The chunks in the sauce are mushrooms

Frittata

A Frittata is an egg dish, kinda like a cross between a quiche and an omelette. Frittatas have saved me countless hungry nights. I can just whip whatever I have on hand to make a sumptuous meal. Its perfect to get rid of any leftovers. Your kids hate veggies? No problem...make a frittata!

Traditionally frittatas are eggs with some veggies and meat, thrown into a skillet. But I'm anything but traditional. I have these beautiful Chorizo sausages I got from Goa, which got me thinking on giving a Spanish twist to this Italian favourite. So I have decided to marry the Italian Frittata with the Spanish Tortilla de Patatas...and voila!

Ingredients:


(Serves 4)
6 Eggs
2 Potatoes
4 Cloves of Garlic
200gms of Chorizo
100gms Cheddar cheese

(Like I mentioned, you can use absolutely anything but the kitchen sink. I'm going for a Spanish twist, but feel free to try mushrooms, cauliflower, chicken...whatever you have in the fridge)

Pre-heat the oven to 200°Celsius. Chop up the chorizo into bite size pieces and sauté in flat heavy based pan. I don't add in oil as the meat releases its own oil as it cooks. Once the sausage is cooked, add in the garlic. In another pan, boil the potatoes with some salt, until cooked. Chop up potatoes into bite size pieces and add it into the sausage pan. Whisk eggs in a bowl and add add in grated cheddar cheese. Now pour this to the sausage mix. Tilt the pan to make sure the eggs settle evenly. Cook for a minute or two until you see the eggs at the edge of the pan beginning to set. Sprinkle some more cheddar on top (this will give a nice cheese golden crust)


Put the pan in the oven and bake for 10mins or until the eggs are set. Cool and cut into slices to serve.

To serve:
Frittatas are a meal in itself so you can serve a slice as it is. Or try it with some toasted garlic bread. Leftovers are nearly as good as out of the oven. I like to eat it as breakfast, or mush it into crumbs with some rice and soy for fried rice.


No-Bake Cheesecake (cheat's version)


I LOVE cheesecake. It is my favourite dessert. I judge restaurants (and people) by the cheesecakes they make. And so far, my journey to cheesecake heaven has not been too sweet. Most people never get cheesecake right, and combine that with the price of cream cheese in India, got me thinking...there must be a another way!

Which is why I jumped for joy one fine day while watching Masterchef Australia. During a Masterclass, Matt Preston showed this quick and simple cheats version of a cheesecake (or cheats cake as I like to call it :P). Using his recipe as a base, I decided to try my less fancy more simple version. I'm sticking to incorporating the lemon flavour, but instead of chilli, I'm going for a more traditional cheesecake topping-Strawberry compote. And since this is a cheats recipe, I'm going for a modified version- Strawberry Jam.


You will need:

Digestive Biscuits or Marie Biscuits or Graham Crackers...actually any plain biscuit will do
100gms Butter (melted)
250ml Cream
400ml Condensed Milk
Zest and juice of 2 Limes
(Note: I had some beautiful Limoncello from Italy. So I've used just one lime and a splash of the liqueur)

For the base, crush the biscuits into crumbs along with some melted butter. I like coarse crumbs so I used a motar and pestle. Once combined, press the mix firmly into the base of the bowl. At this point, I will recommend baking the biscuit mix in an oven for around 10 mins, its not mandatory but it will really add some texture and bring your cake together.

In a bowl, whip cream to incorporate as much air as you can. The cream should ideally form soft peaks. In another bowl, whip the condensed milk until thick and mix in the lime juice and zest. Now fold in the cream into the condensed milk mixture until just combined. Pour the mix into the bowl with the crumb base and refrigerate until firm.

Serve with: My cheats version of your favourite berry topping. Pick your favourite jam flavour, be it Blueberry, Raspberry, Cherry, Apricot or my favourite, Strawberry. Gently warm the jam on a low heat. Stir in some honey (optional). If you want a thick sauce, add in some corn starch. Set aside to cool down somewhat and spoon over the cheesecake. Try experimenting with the base as well. You can use oreos or even pretzels as a base, just skip the butter though


Tip: Make sure you use a wet and very sharp knife to cut the cake


Fluffy Buttermilk Pancakes

Pancakes to me is synonymous with Sunday breakfast. This is such a breakfast classic. You can pair it with absolutely anything, from fruits to bacon, and it will still taste pretty damn good.

You will find two schools of thought when it comes to pancake making. One insisting on separating the eggs and the other that doesn't. I belong to the former category. I know its more effort, but its the only only way for fluffy pancakes. If you don't care too much for fluff and prefer a flatter flapjack, use whole eggs,

Ingredients:


2 Eggs (separated)
2 cups Flour
1 cup Buttermilk
4 tablespoons Sugar (varies on how sweet you want your cakes)
5 tablespoons unsalted butter ( melted and lukewarm)
2 teaspoon Baking powder
1/2 teaspoon Baking soda
1 teaspoon Vanilla essence
A pinch of salt
(optional: a shot of your favourite liqueur for added zing)

Separate the eggs. Put yolks in a large bowl. Add buttermilk and the butter to the yolks and stir to combine. In another bowl whisk up the egg whites till they are fluffy and form soft peaks.

In a third bowl combine your dry ingredients together ie: flour, sugar, salt, baking powder and baking soda. Add in the egg yolk mixture and stir still the ingredients loosely come together. Don't worry about the mix being lumpy. Now, gently fold the egg whites into the batter until incorporated.

Use a large, heavy skillet or griddle. If your Indian, use your dosa pan. Melt a tablespoon of butter and add the batter to the pan. Pancakes are ready to flip once a few bubbles appear on the surface and you can easily slide you spoon under. Flip till the other side is done as well.

Serve with:
The possibilities are endless! It is traditionally served with maple syrup, but my favorite is with Nutella, some bananas and my home made caramel sauce (recipe coming soon!). But it has known to go with ice cream, fruit, nuts, honey, whipped cream or any other sweet goodness you can think of. Or go the savory way of bacon and cheese.

Tip: I tend to mix the dry ingredients in a jar before hand and store it as a ready to use pancake mix. Makes the cooking time so much quicker.